The Site Audit Issues Report lists all the issues on a domain that were found by our crawler. You can switch from the list of all issues to errors, warnings, or notices by clicking on the corresponding tab. Remember:
- Errors are the most severe issues on your site.
- Warnings represent issues of medium severity.
- Notices are considered less severe than errors or warnings. Notices contain information that some people might consider useful for fixing a site, but they don’t impact your overall site health score.
You’ll also see how many pages were found having each issue, as well as the trend of discovered issues.
Note: this article explains how to review and interpret the Site Audit Issues report. For troubleshooting advice, please refer to the Troubleshooting Site Audit article.
Trend
In the column next to each issue in the table is a small trend graph showing the issue’s presence on your site over time. Clicking on the trend graph will take you to the Progress tab of your audit.
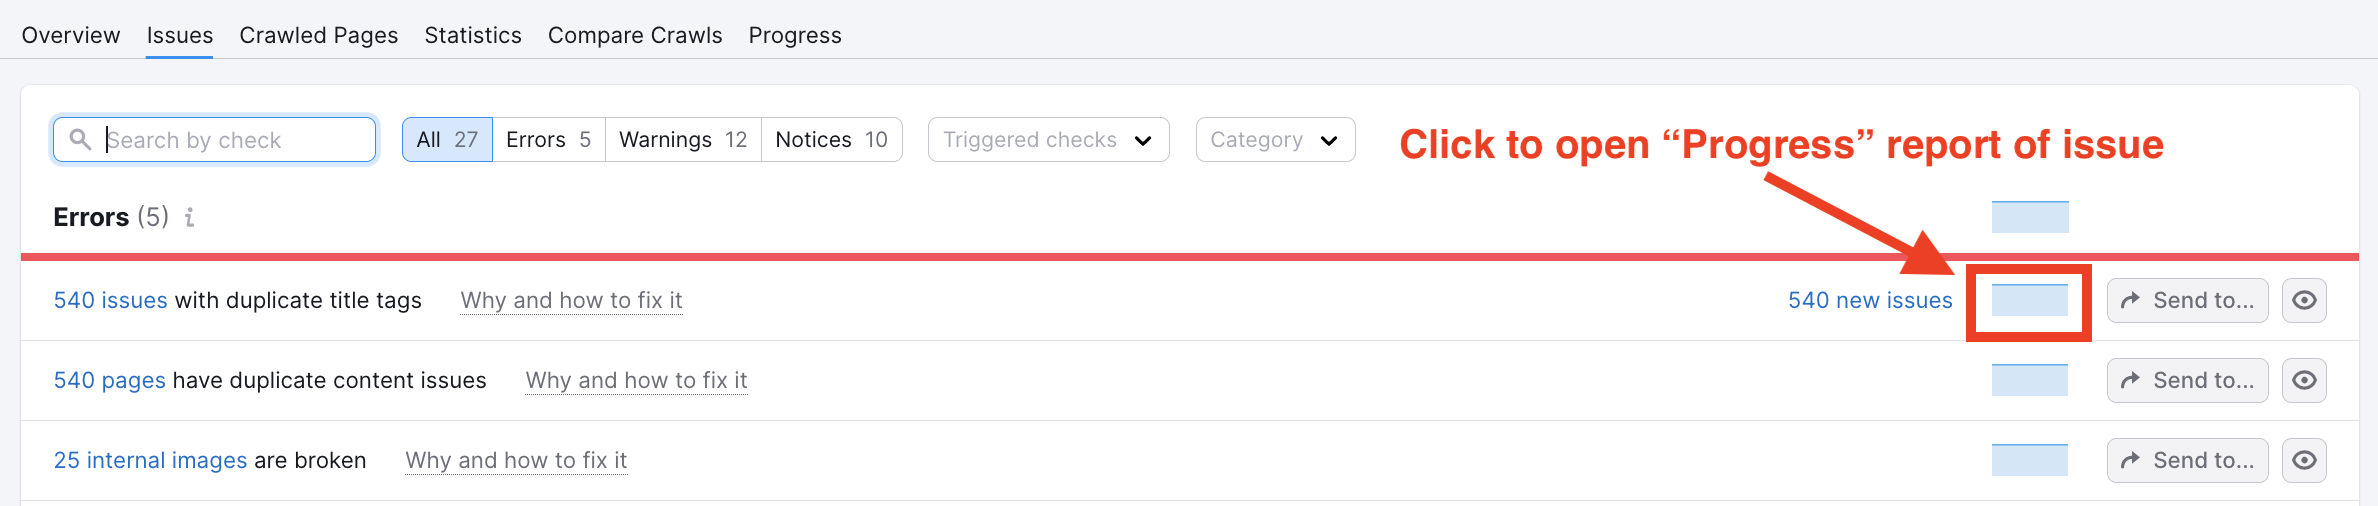
From here you can view the trend of the issue over a selected time frame and compare it to other issues found by the Site Audit.
About the Issues
Each issue contains a “Why and how to fix it” explanation so you can read our suggested way of dealing with the issues.
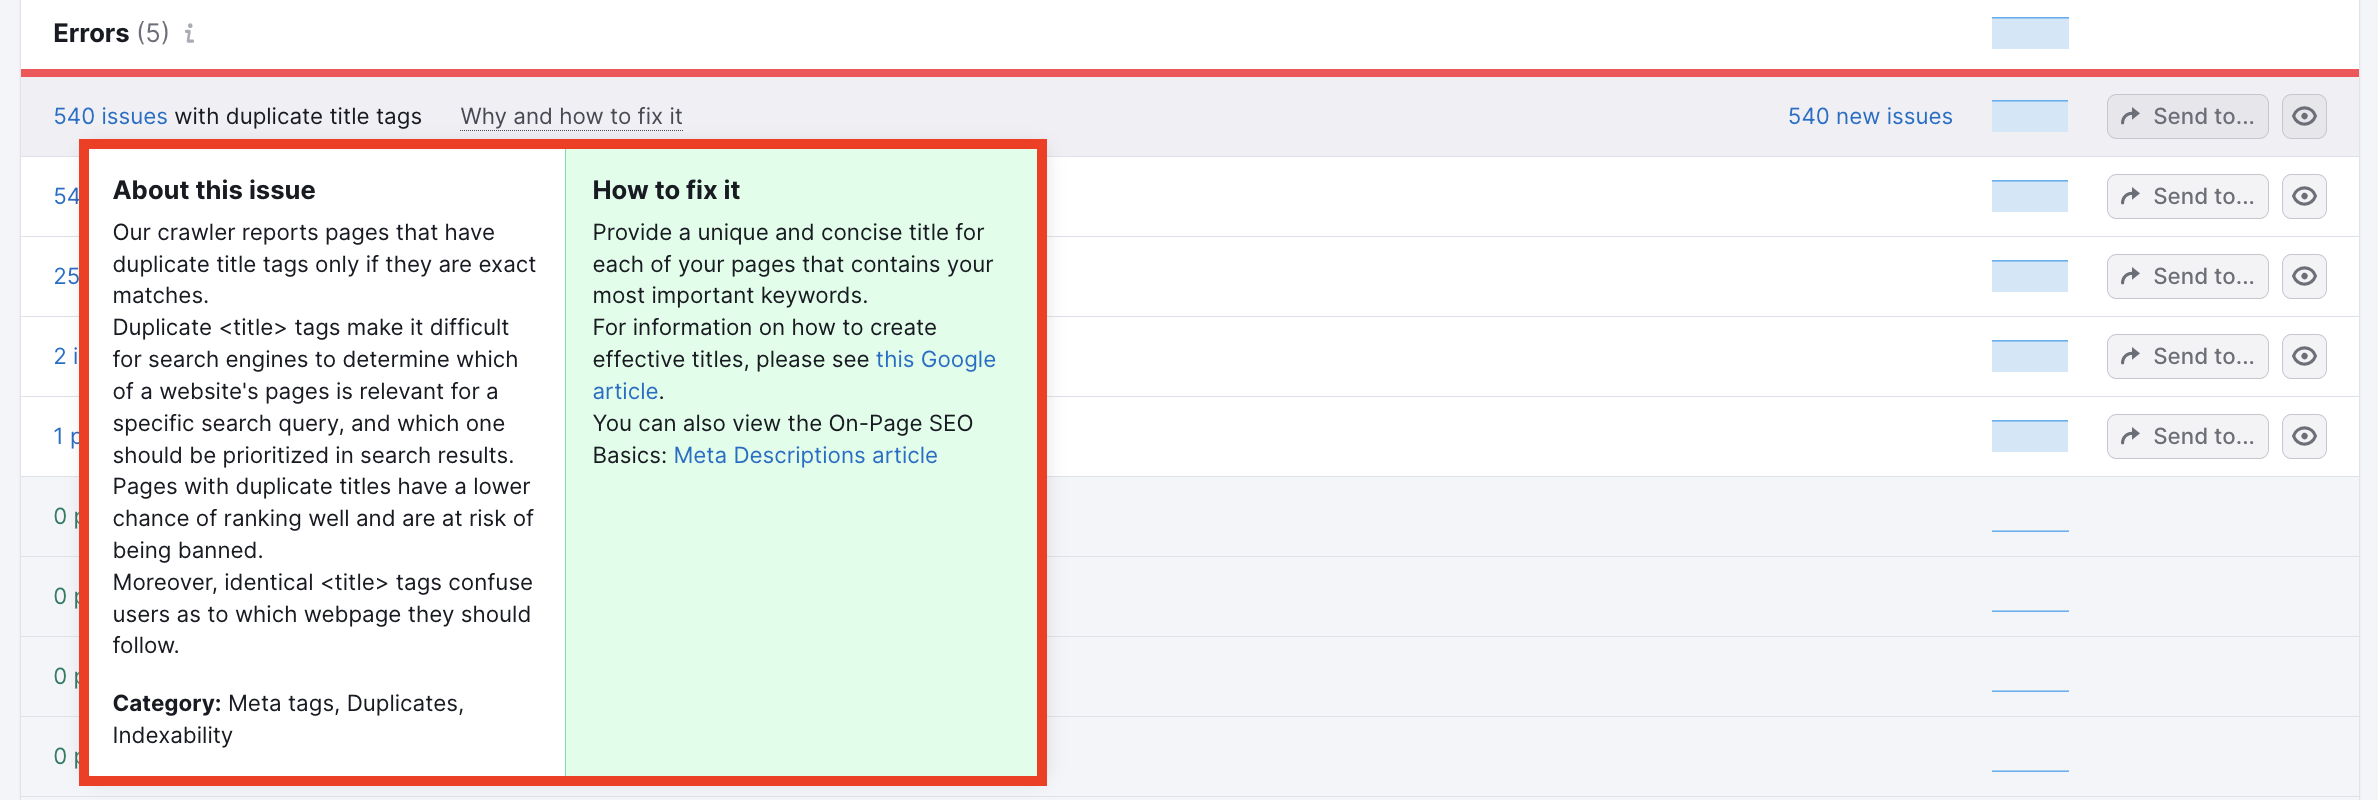
Even if an issue wasn’t found on your site, there will still be a “Learn more” button that opens up a dialog box with more information about the issue.
The full list of issues Site Audit checks for can be found here: What Issues Can Site Audit Identify?
Detailed Report
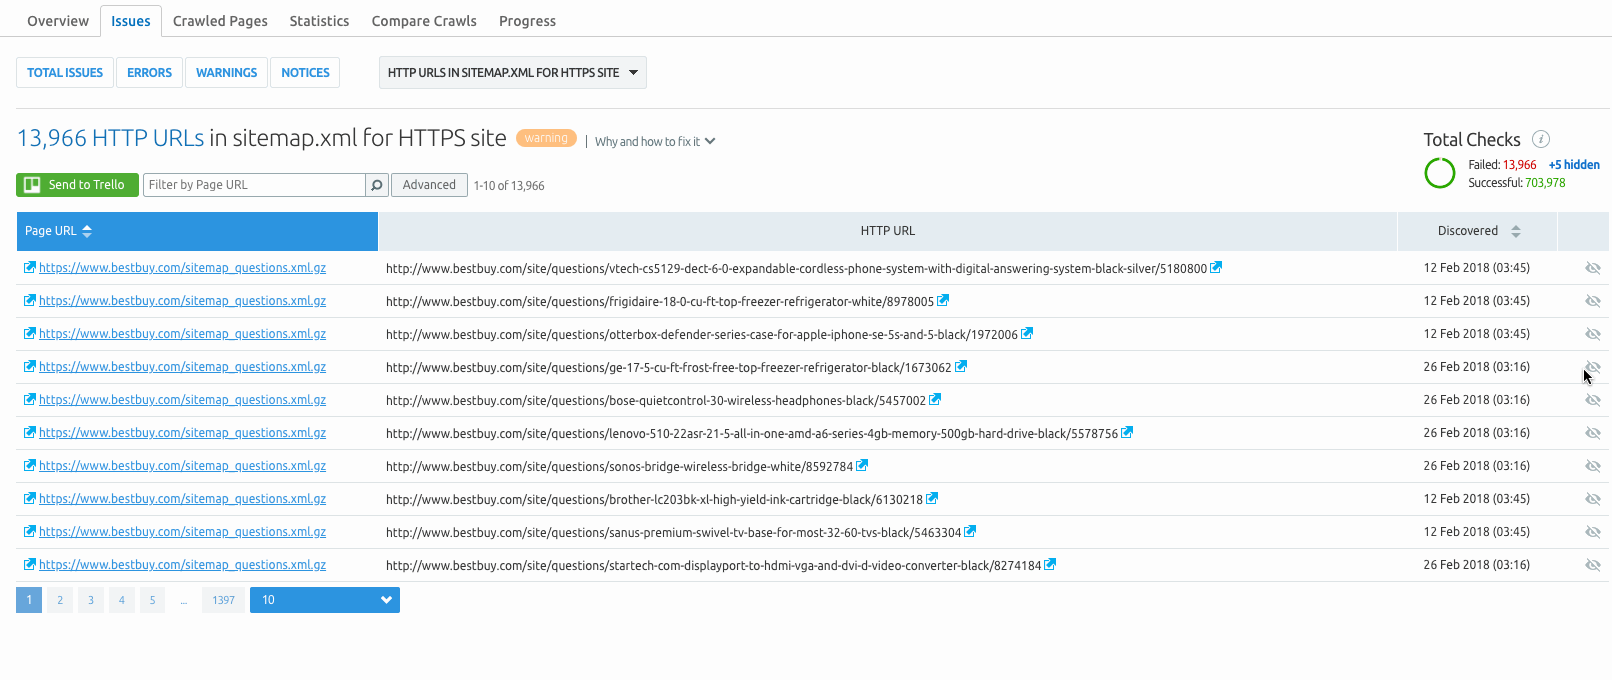
Clicking on any issue from the list will direct you to a page that lists all of the URLs on your site that currently has the corresponding issue.
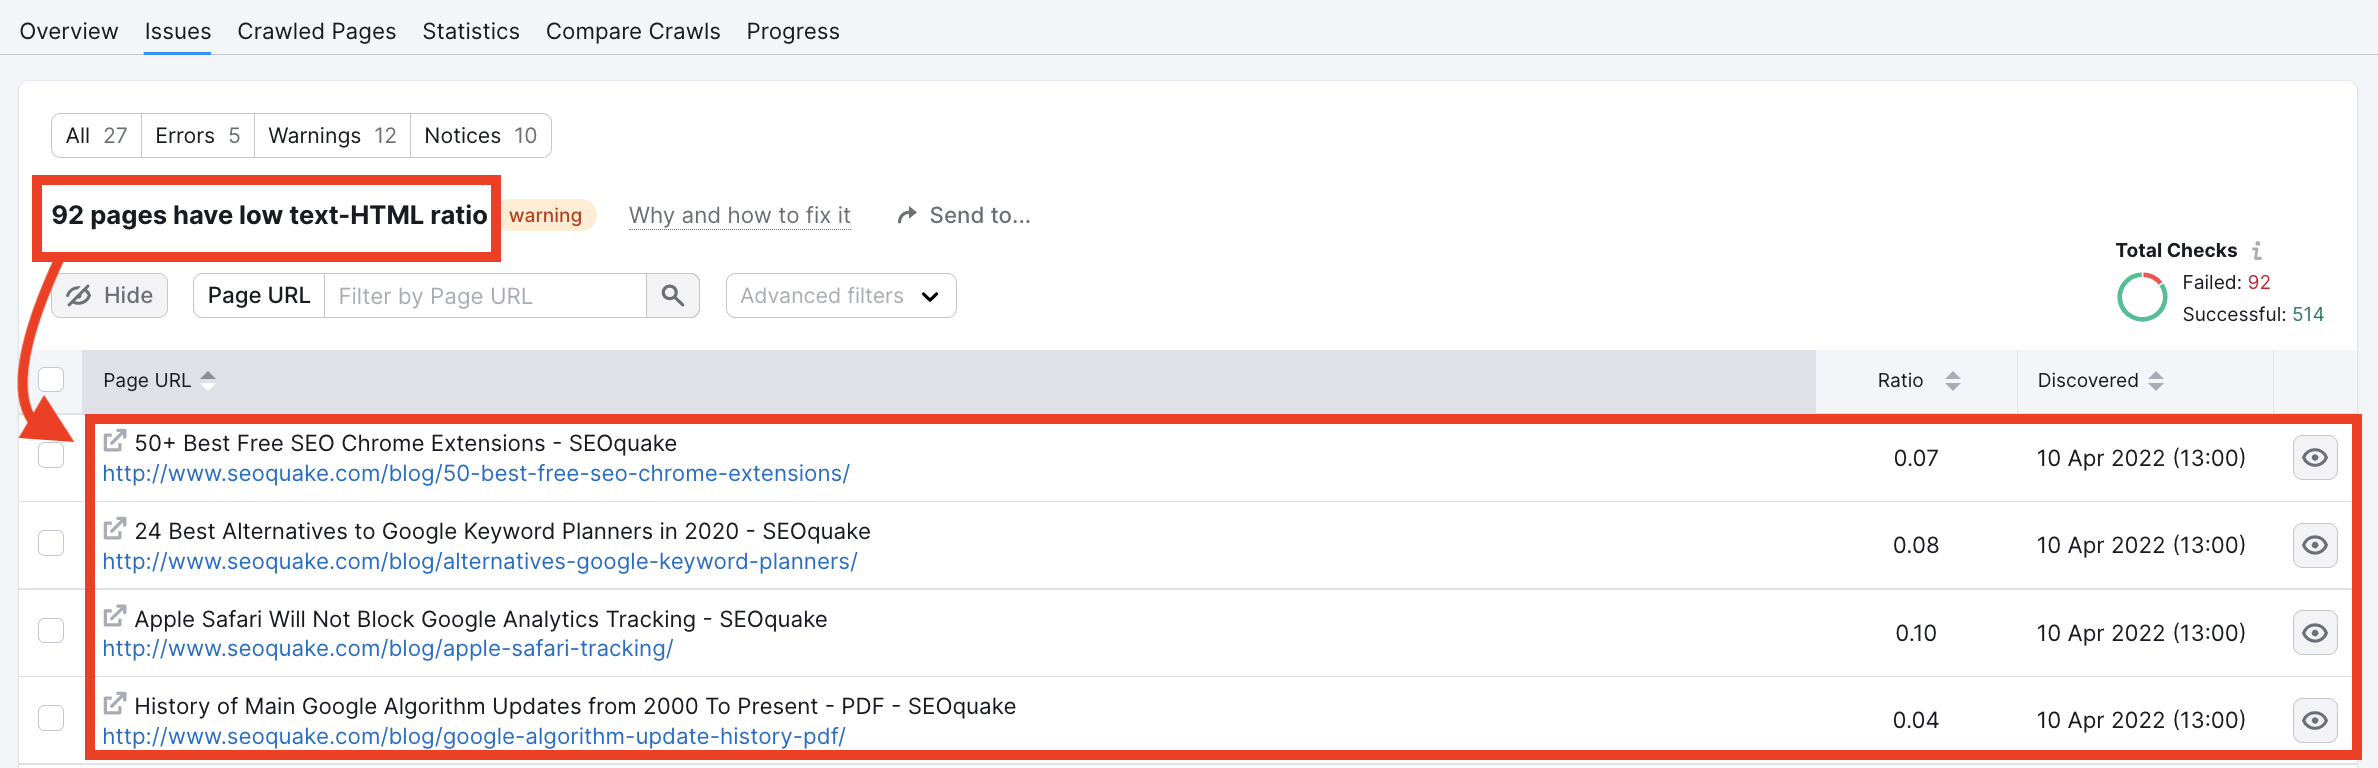
You can also open the drop down box for “Select an Issue” to view all of the issues listed in a clickable menu. Select your issue to inspect from here and go to the detailed report. Then, filter your table of URL’s with the search bar or by opening the Advanced filters menu.

If you’re auditing a large site, this is a good way to identify exactly where your issues are. Enter a subfolder or subcategory of your site here to focus on a specific area and focus your analysis.
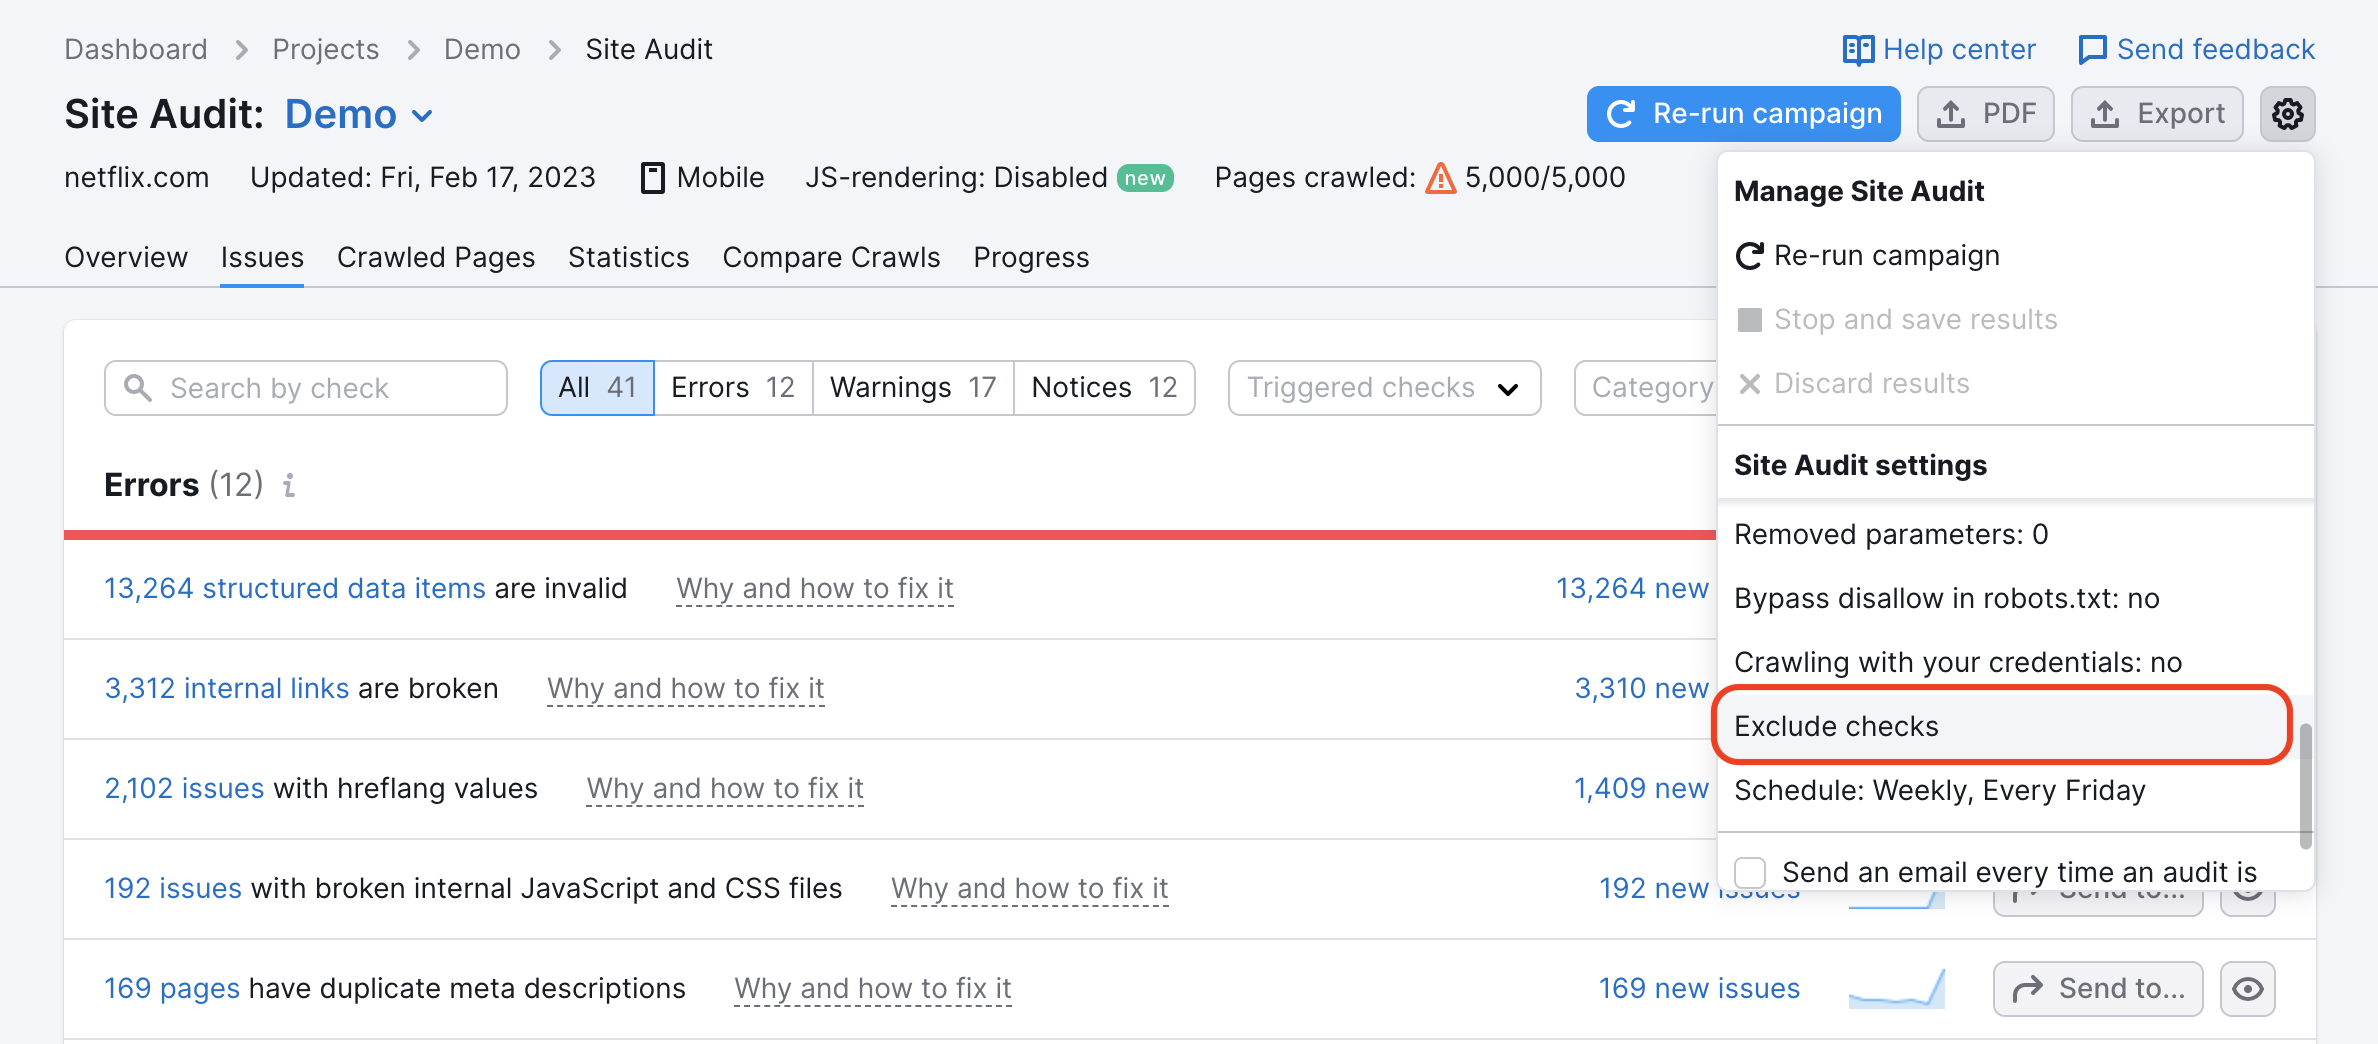
You will also be able to view all of your excluded checks. To see all of the checks that were excluded, simply click on the settings tab in the top right and navigate down to where it says exclude checks.
Hiding Issues in Site Audit
To customize the scope of issues your audit checks for, you have the following options:
-Hiding an entire issue
-Hiding specific pages with issues
-Excluding checks from your audit in bulk
Hiding entire issues
To hide an entire issue, use the eye icon in the far right-hand column of the table to hide entire issues from your audit report.
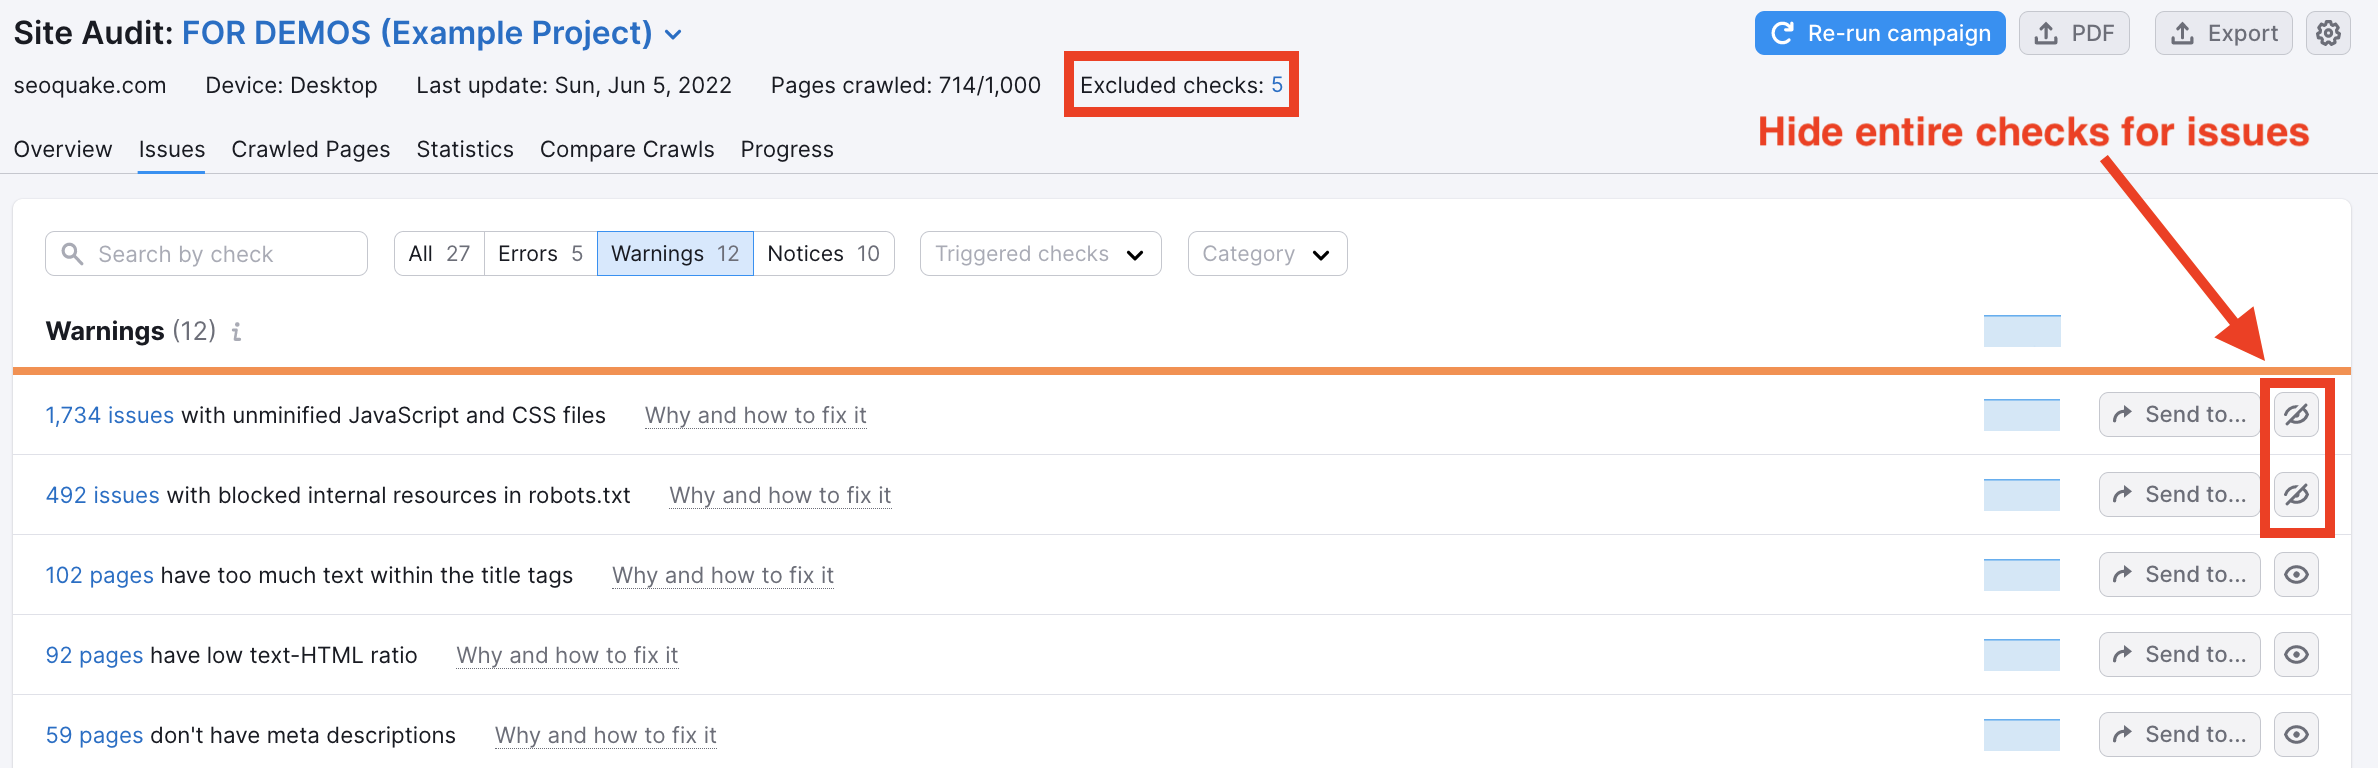
This will exclude every occurrence of the same problem from appearing in your report, and we will no longer check for these issues in future crawls.
For example, if you hid “897 outgoing internal links contain nofollow attribute,” the audit would no longer take into account any of the 897 instances of this issue when calculating your score.
You’ll see how many groups of issues you hide beside above the table listed as your “excluded checks.”
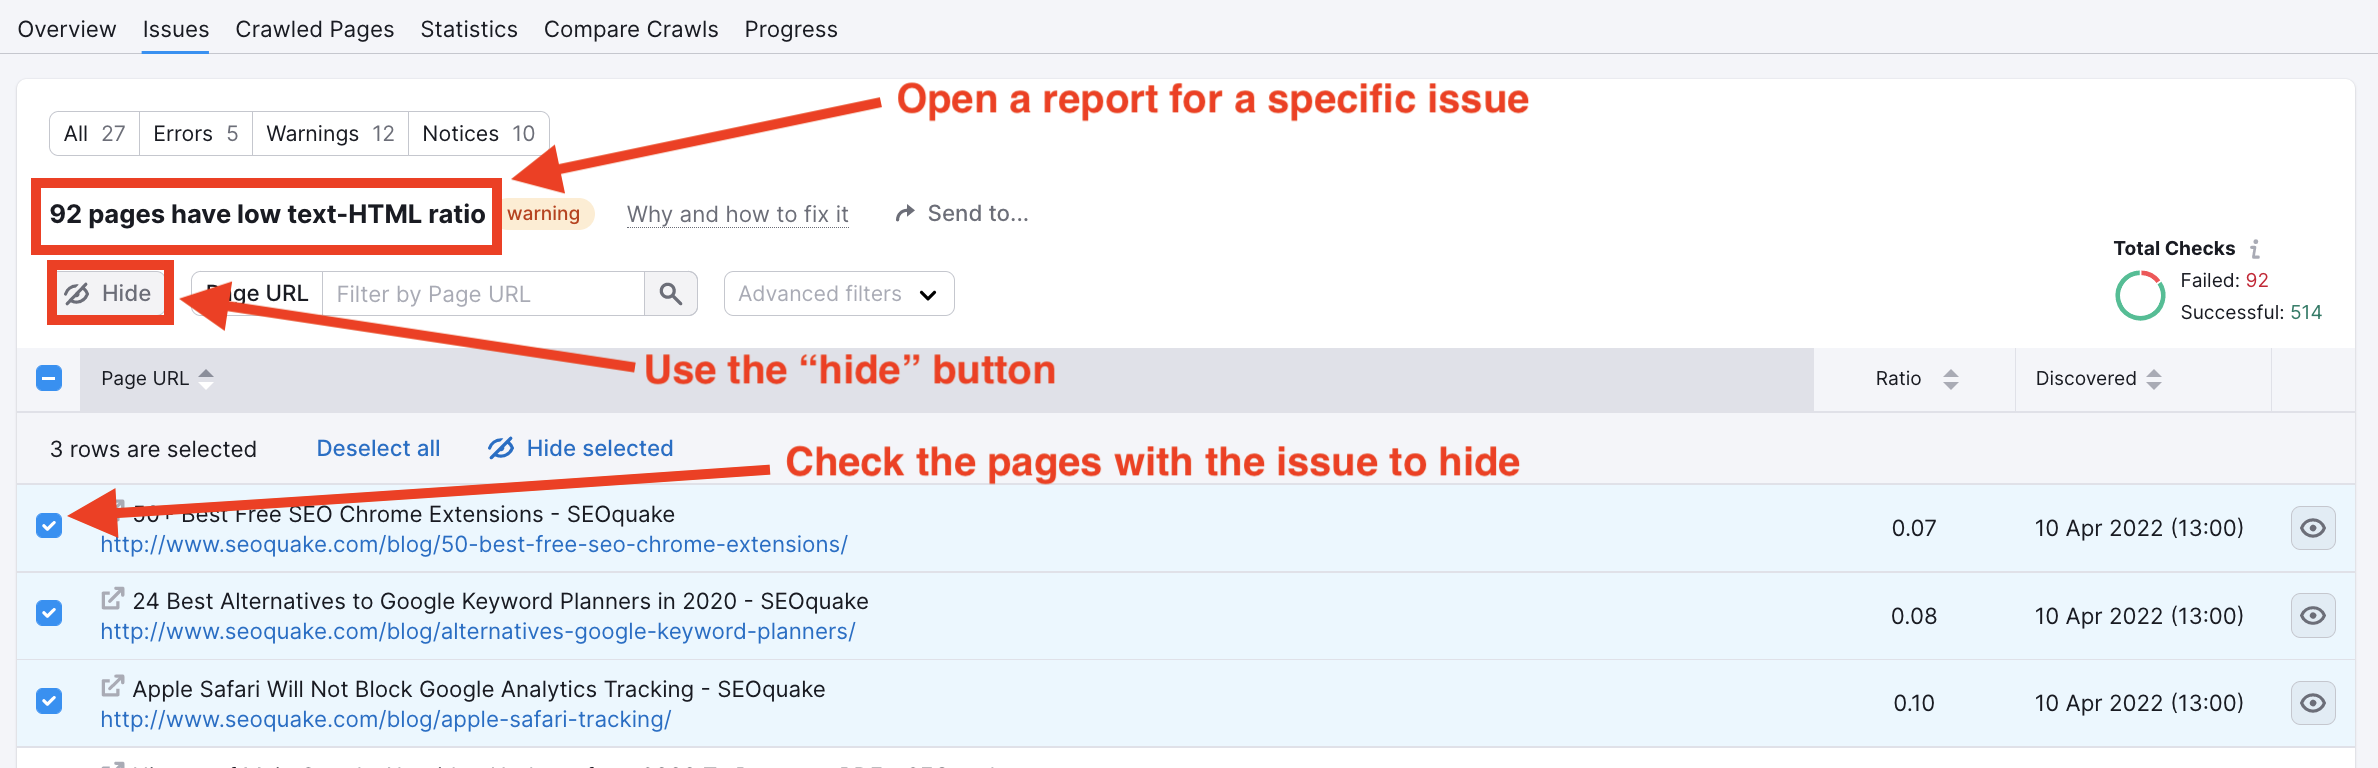
Hiding individual pages
Second, you can hide individual pages with issues from your audit from a detailed report. If you click on a specific issue from your issues table, it will bring you to a detailed report and you can see all of the pages where the issue was found.
From there you can check specific rows and choose to “hide” the issues on these pages from your audit.
Hiding checks in bulk
Third, you can exclude checks in bulk with the “excluded checks” option in the settings gear. This menu will also show you all of your hidden checks.
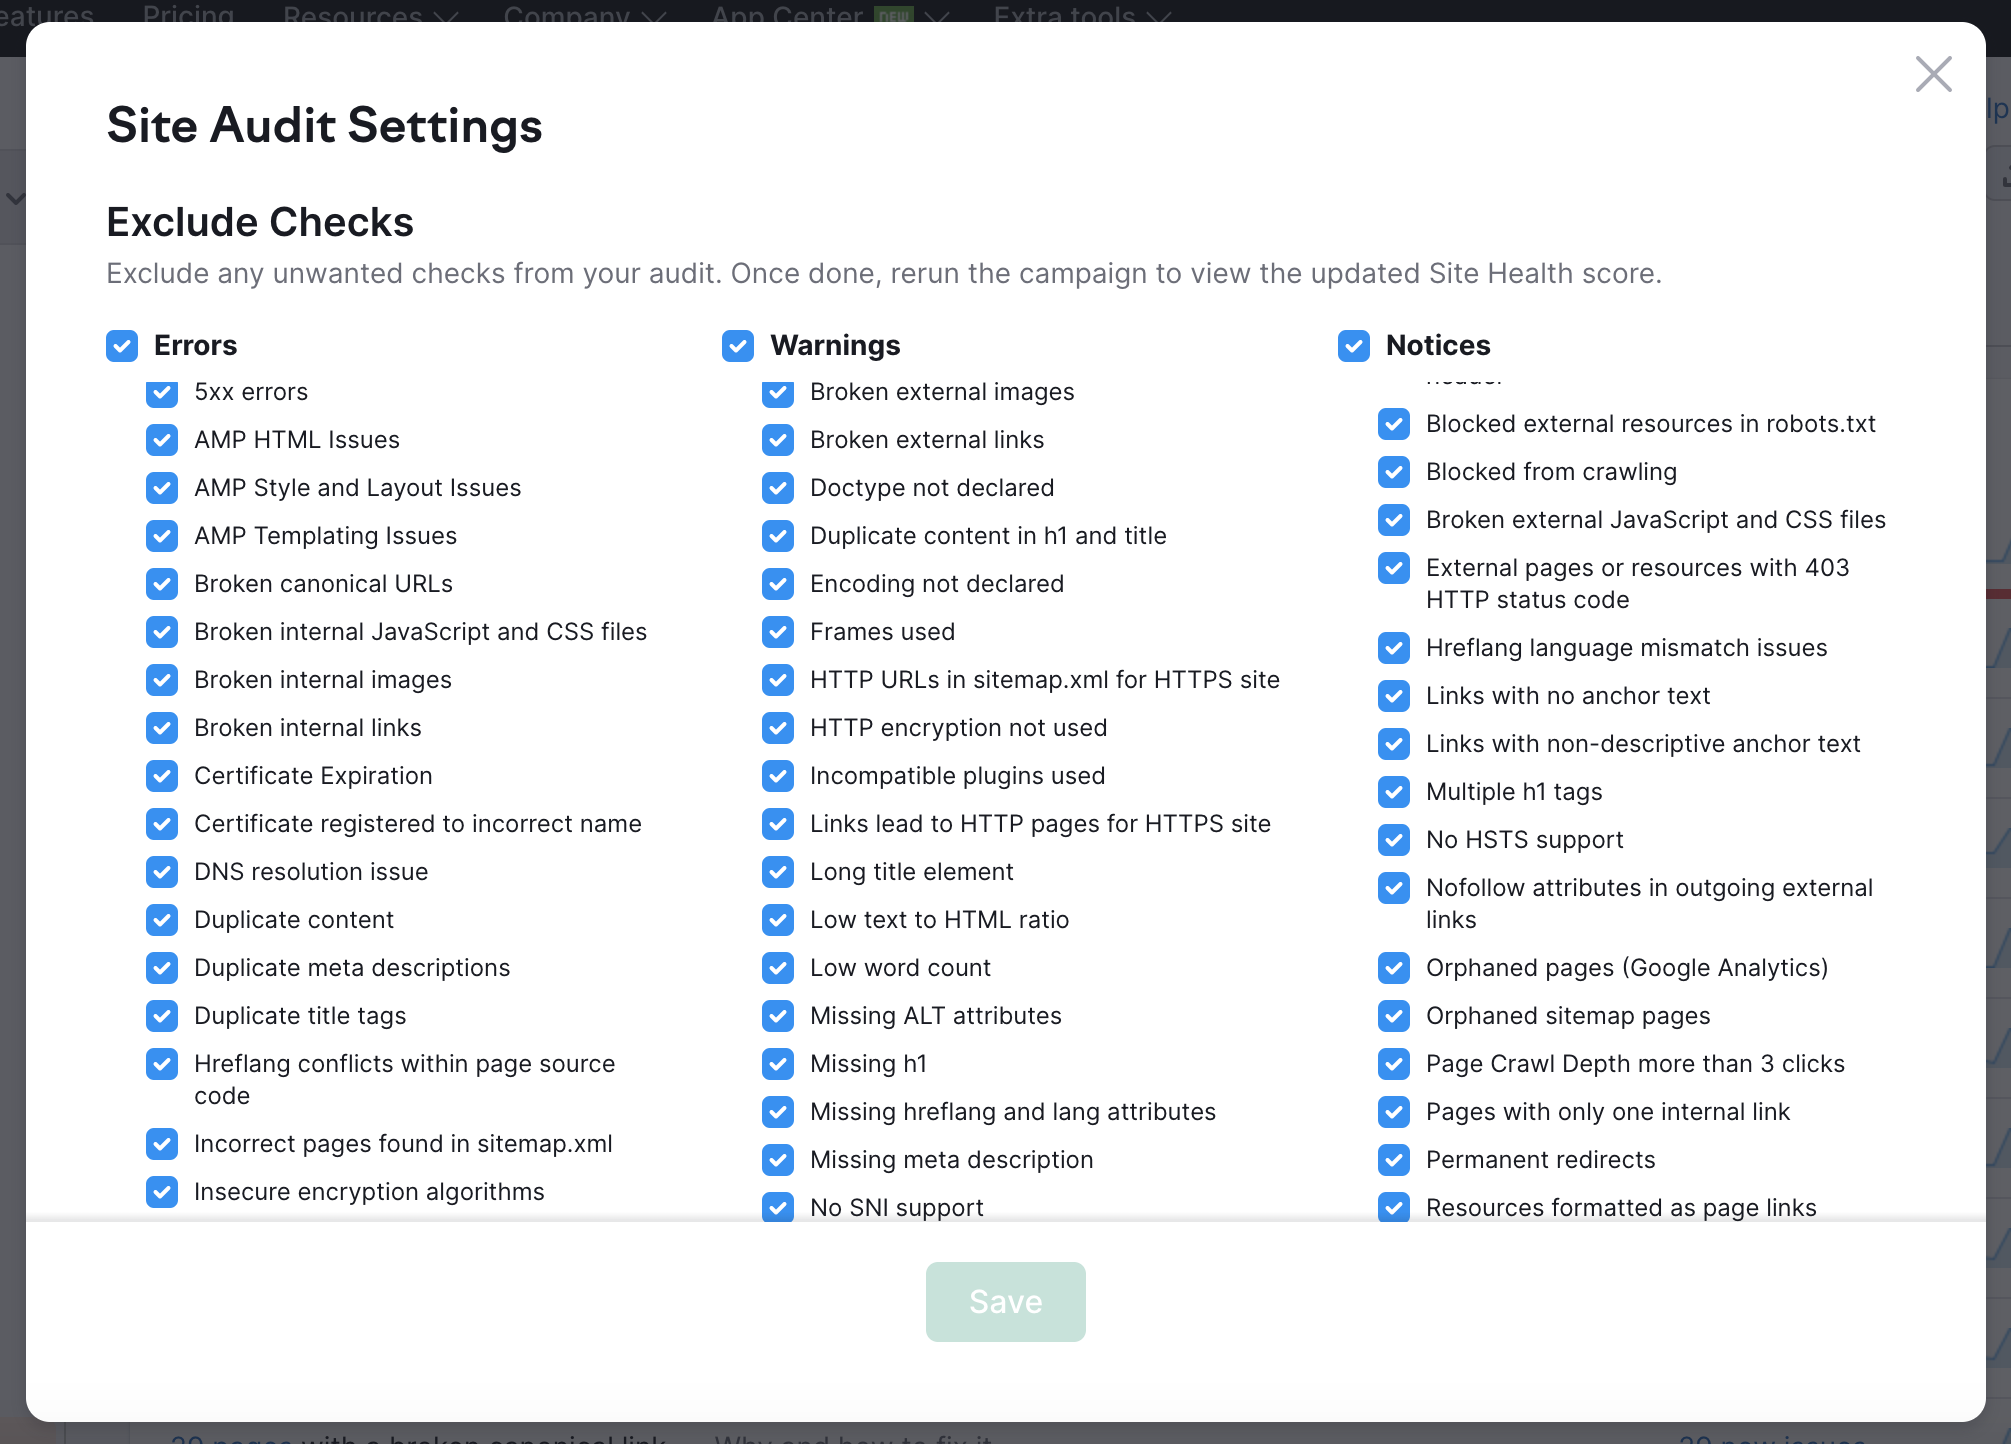
Excluding checks tells our crawler to skip certain checks from your audit completely. You can use this if the audit is finding issues that are irrelevant to your website goals. After excluding checks from your audit, you will need to re-run your campaign to view your updated Site Health Score.
Any issues that are hidden or excluded will no longer affect your Site Health. For example, let’s say you want to exclude the ALT tags issue from the report. You can hide all of these issues in your audit and you’ll see your Site Health improve after a re-crawl.
Each issue you choose to hide will remain hidden until you unhide them. This way, the issues you don’t care about will remain hidden from the reports and won’t have an effect on your Site Health as the Site Audit re-crawls your site.
Unhiding Issues
Unhiding issues is also easy. All you have to do is select the blue text above the detailed report that says how many hidden checks you have, and select “undo” next to the issue you want to include in your audit again. Watch below.
You can also unhide issues by re-opening the “exclude checks” menu in the settings gear.
Trello Integration
One of the coolest features we’ve added to this section is the ability to integrate your issue management with Trello. This can be a great way to organize your site cleanup process and manage your workflow if you use Trello boards to manage your team's productivity.
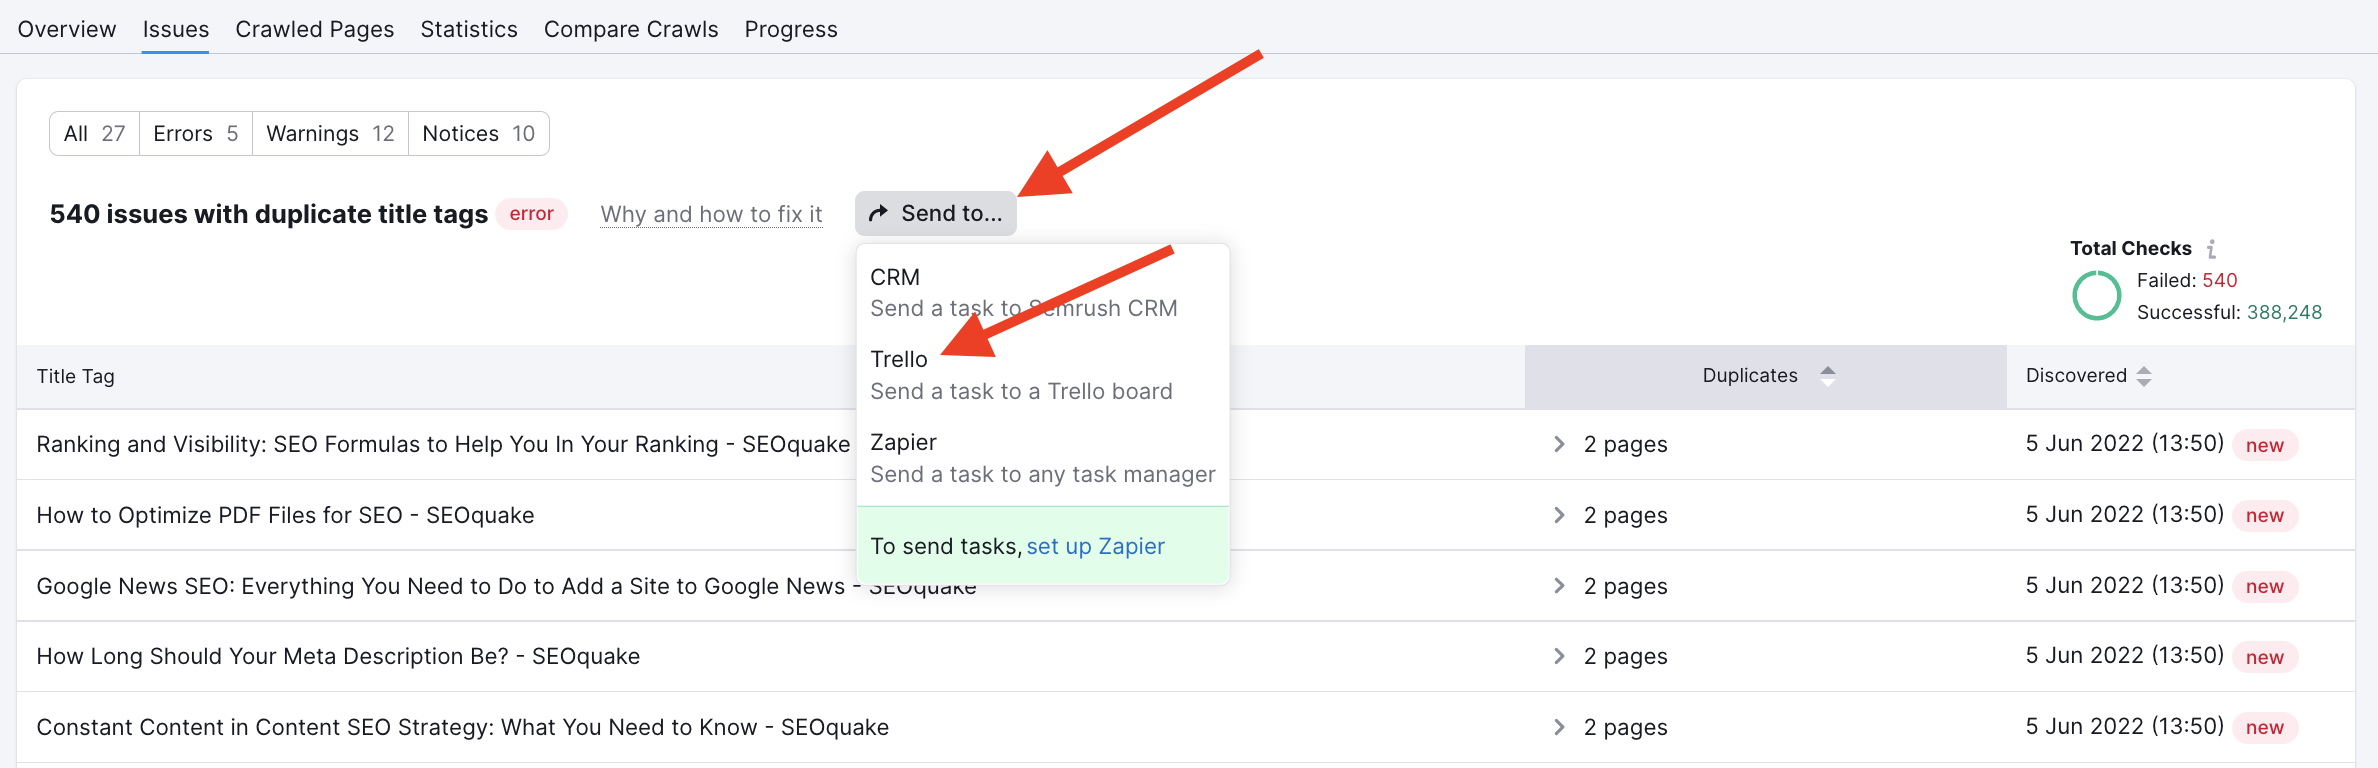
After opening a specific issue, you can select "Send to Trello" which creates a card dedicated to the issue on one of your Trello boards.