Con Social Poster, se pueden programar y crear publicaciones en dos sencillos pasos, que son los siguientes:
- Conectar al menos un perfil de redes sociales
- Ajustar la configuración
Pueden conectarse a Social Poster las siguientes cuentas de redes sociales:
- Facebook: páginas de empresa
- LinkedIn: perfiles personales y páginas de empresa
- Instagram: páginas de empresa
- Perfil de Empresa en Google
- Pinterest: perfiles
- TikTok: perfiles
Crea contenidos fácilmente con el Asistente de IA en Social Poster, una extensión de Social Content AI.
Este artículo te guiará a través de la configuración y los ajustes de la herramienta.
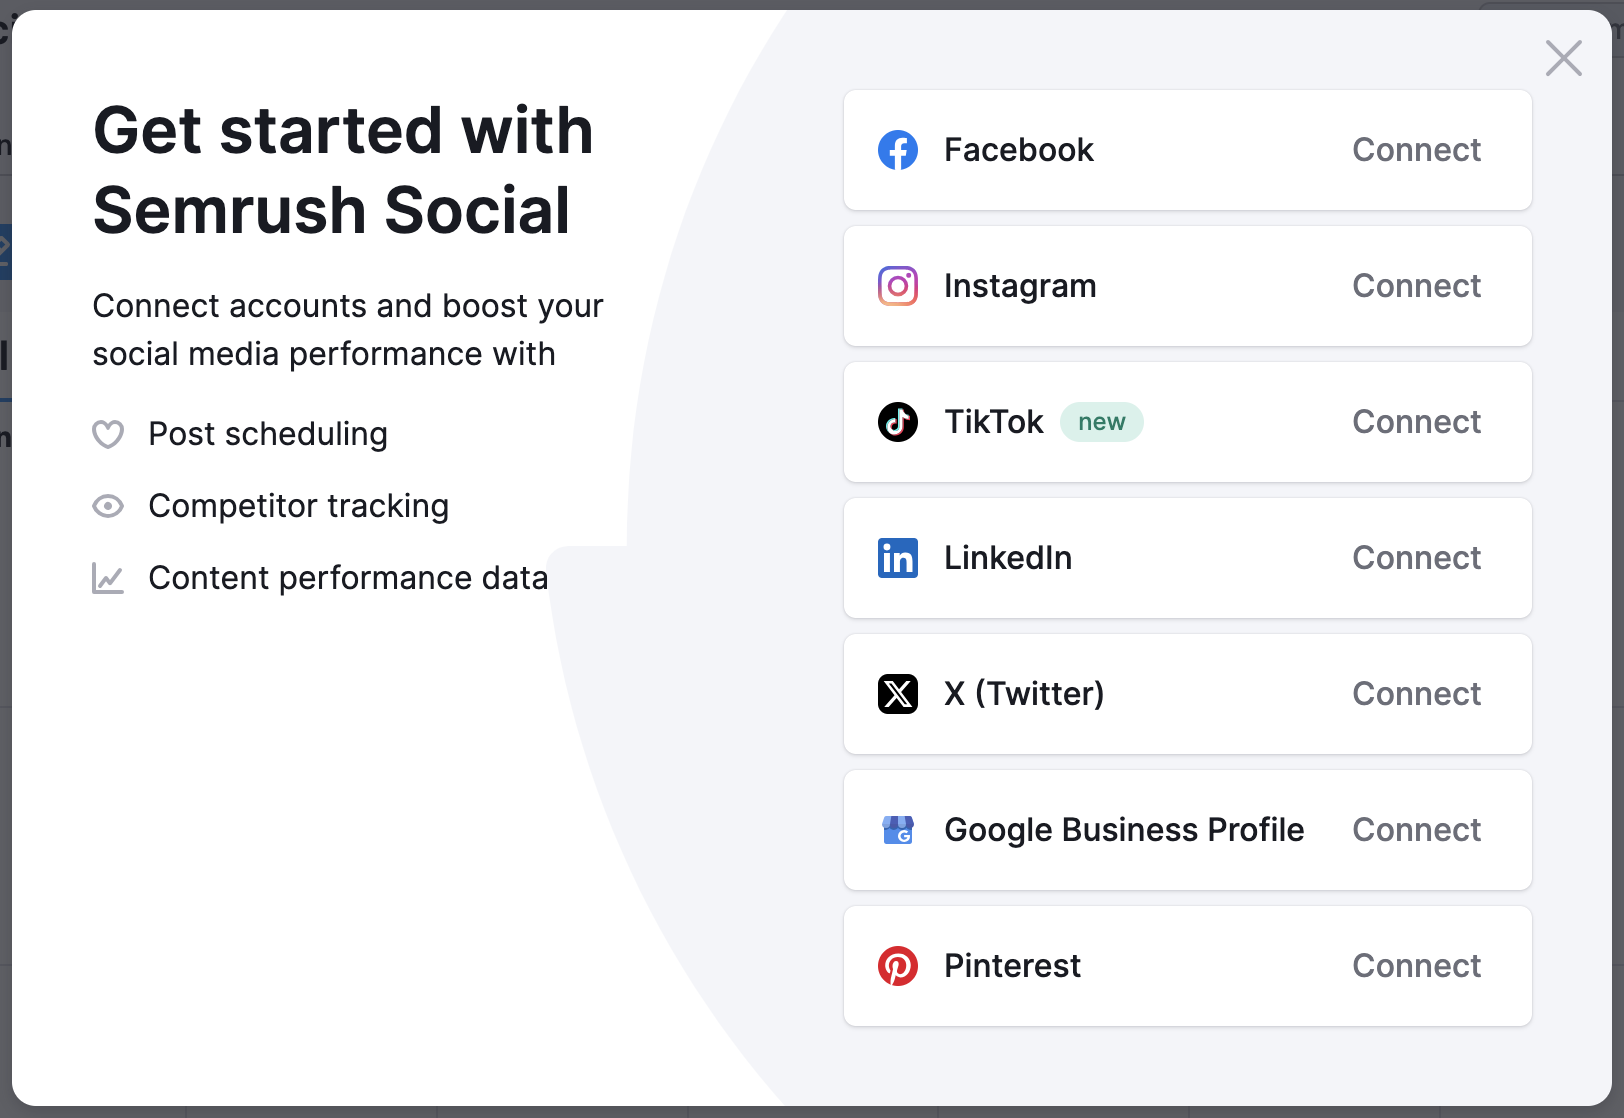
Paso 1. Conecta tus perfiles de redes sociales
Empieza eligiendo un perfil de un canal de redes sociales y conéctalo haciendo clic en el botón "Conectar".
Si has iniciado sesión en un perfil de redes sociales y tienes abierto Semrush en el mismo navegador, la herramienta te pedirá que autorices a Semrush para utilizar tu cuenta. De lo contrario, tendrás que iniciar sesión en la plataforma desde la que deseas publicar y autorizar a Semrush a utilizar tu cuenta después de eso.
Entonces, ¿cómo puedes dar permiso a Semrush para utilizar cada plataforma de redes sociales?
Página de Facebook
- Añade tu perfil: selecciona la página o páginas de Facebook desde donde vas a publicar y pulsa "Guardar".
Perfil de Empresa en Google
- Sincroniza tu perfil de Google con Social Poster.
Perfil de LinkedIn
- En la ventana emergente, haz clic en "Permitir".
- Añade tu perfil: selecciona el perfil o perfiles desde donde quieres publicar y pulsa "Guardar".
Perfil de Instagram
- En la ventana emergente, haz clic en "Autorizar".
- Añade tu perfil: selecciona el perfil o perfiles y pulsa "Guardar".
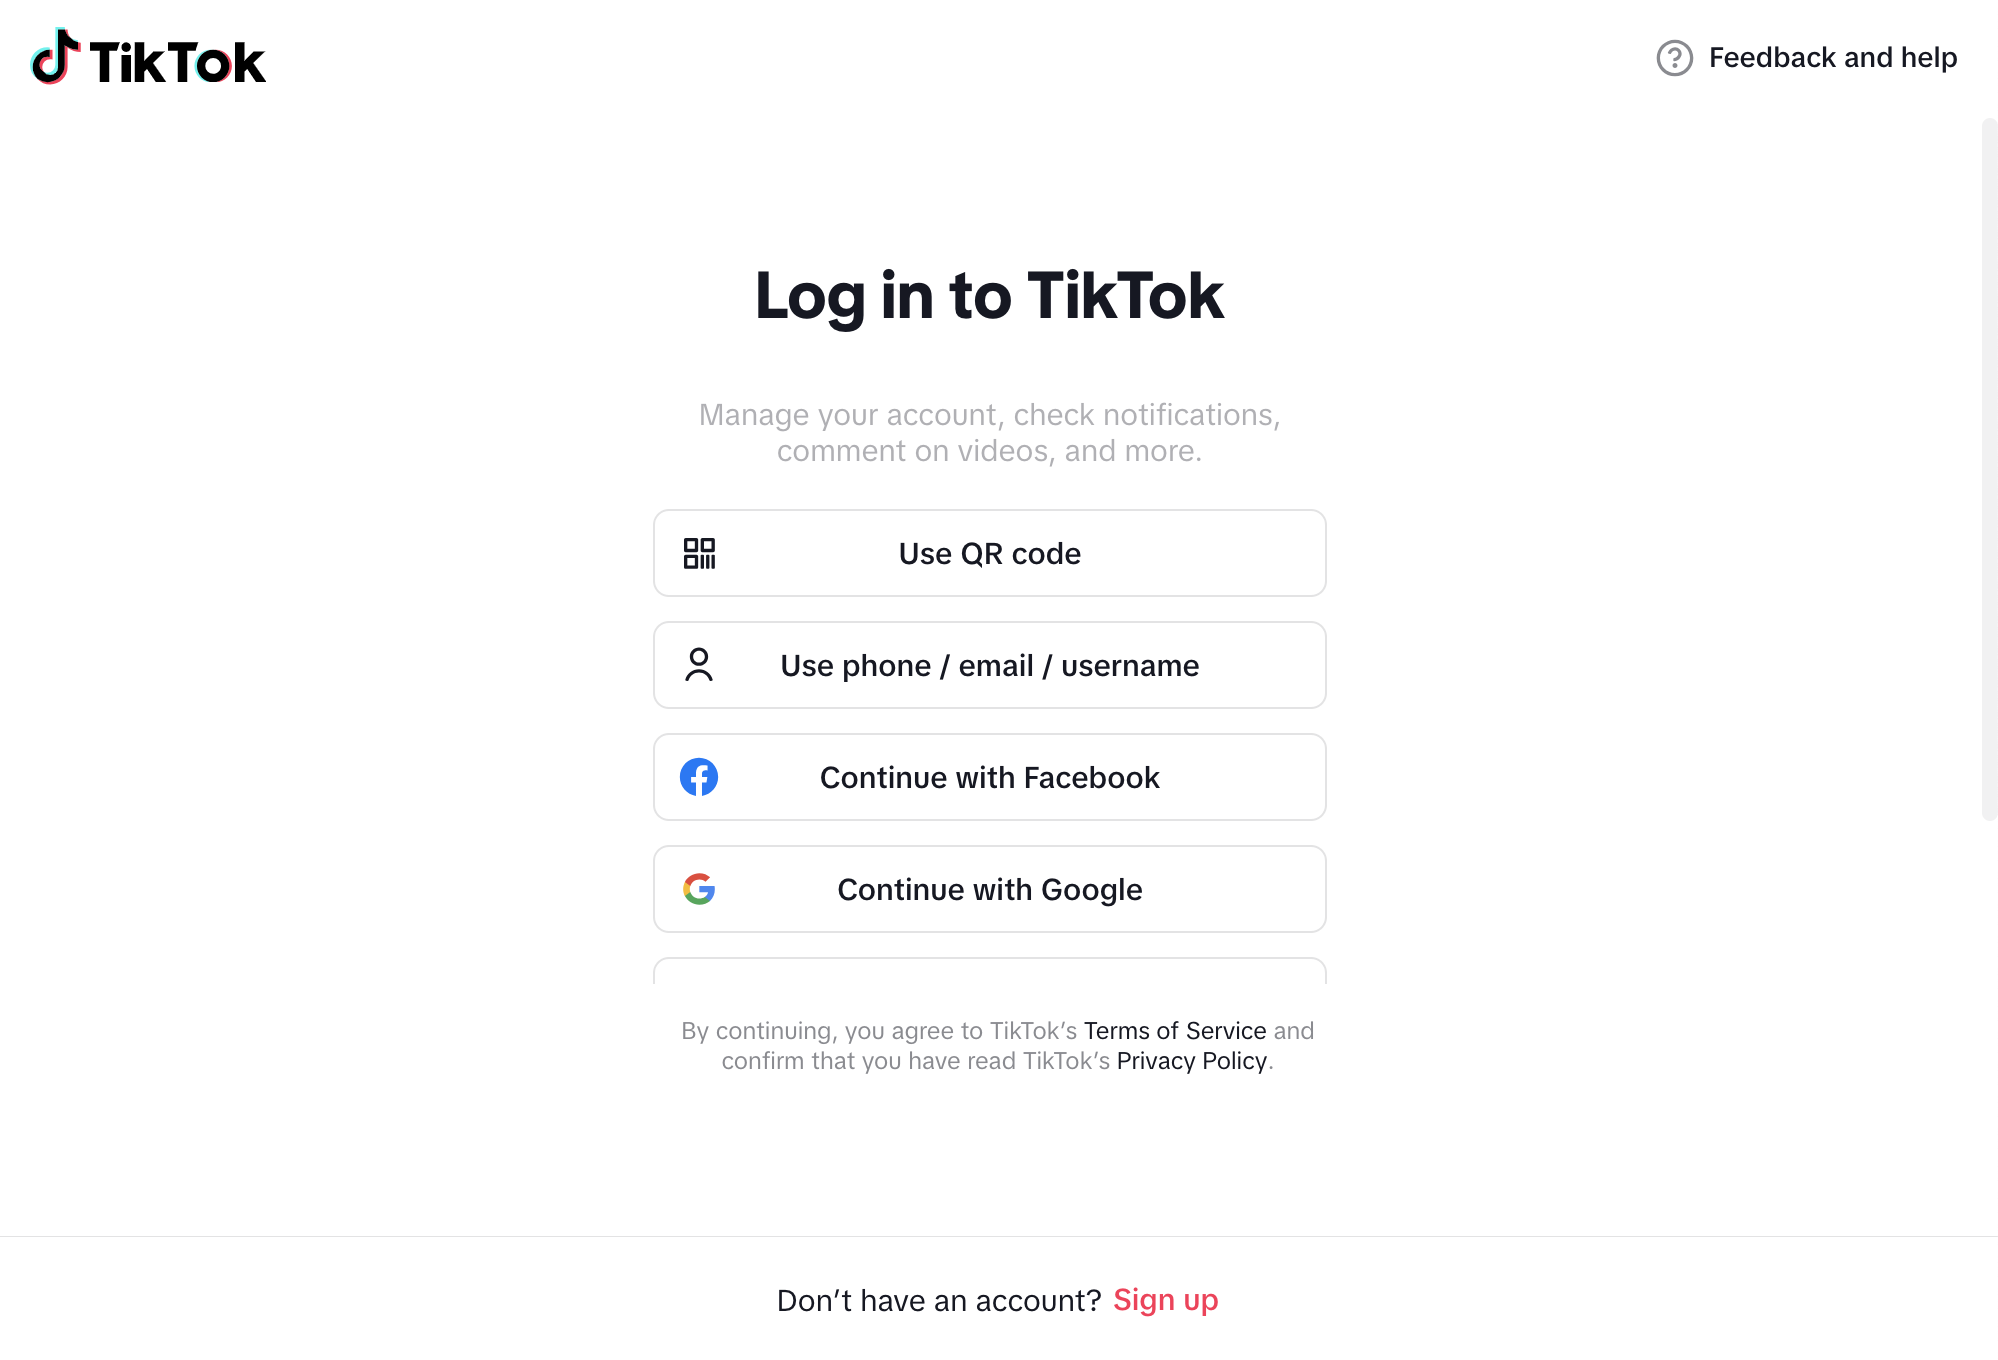
Perfil de TikTok
Inicia sesión en tu cuenta de TikTok eligiendo una de las opciones para autorizar la conexión:
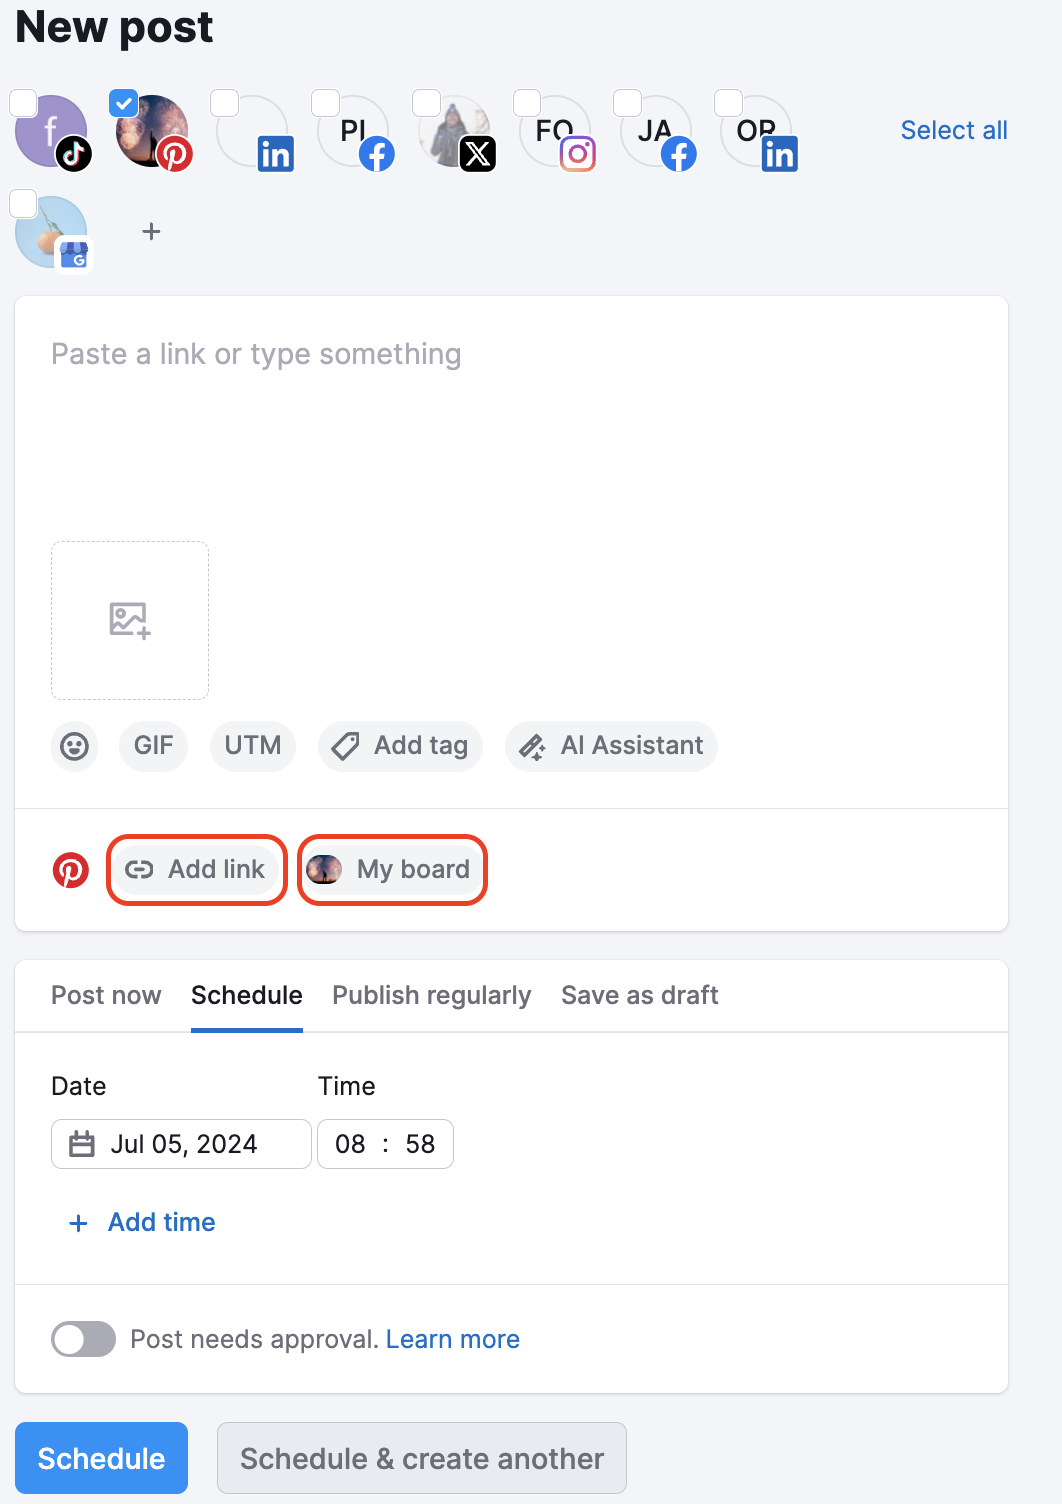
Perfil de Pinterest
Una vez que conectes tu cuenta de Pinterest, la herramienta encontrará automáticamente tus tableros, así que cuando crees un post también elegirás el tablero en el que publicarlo en el menú desplegable.
También tendrás la opción de añadir un sitio web para tu imagen:
Una vez que hayas conectado un perfil de redes sociales, puedes añadir más perfiles directamente desde la pestaña Calendario de la herramienta, haciendo clic en el botón "Añadir perfil" de la parte superior izquierda.

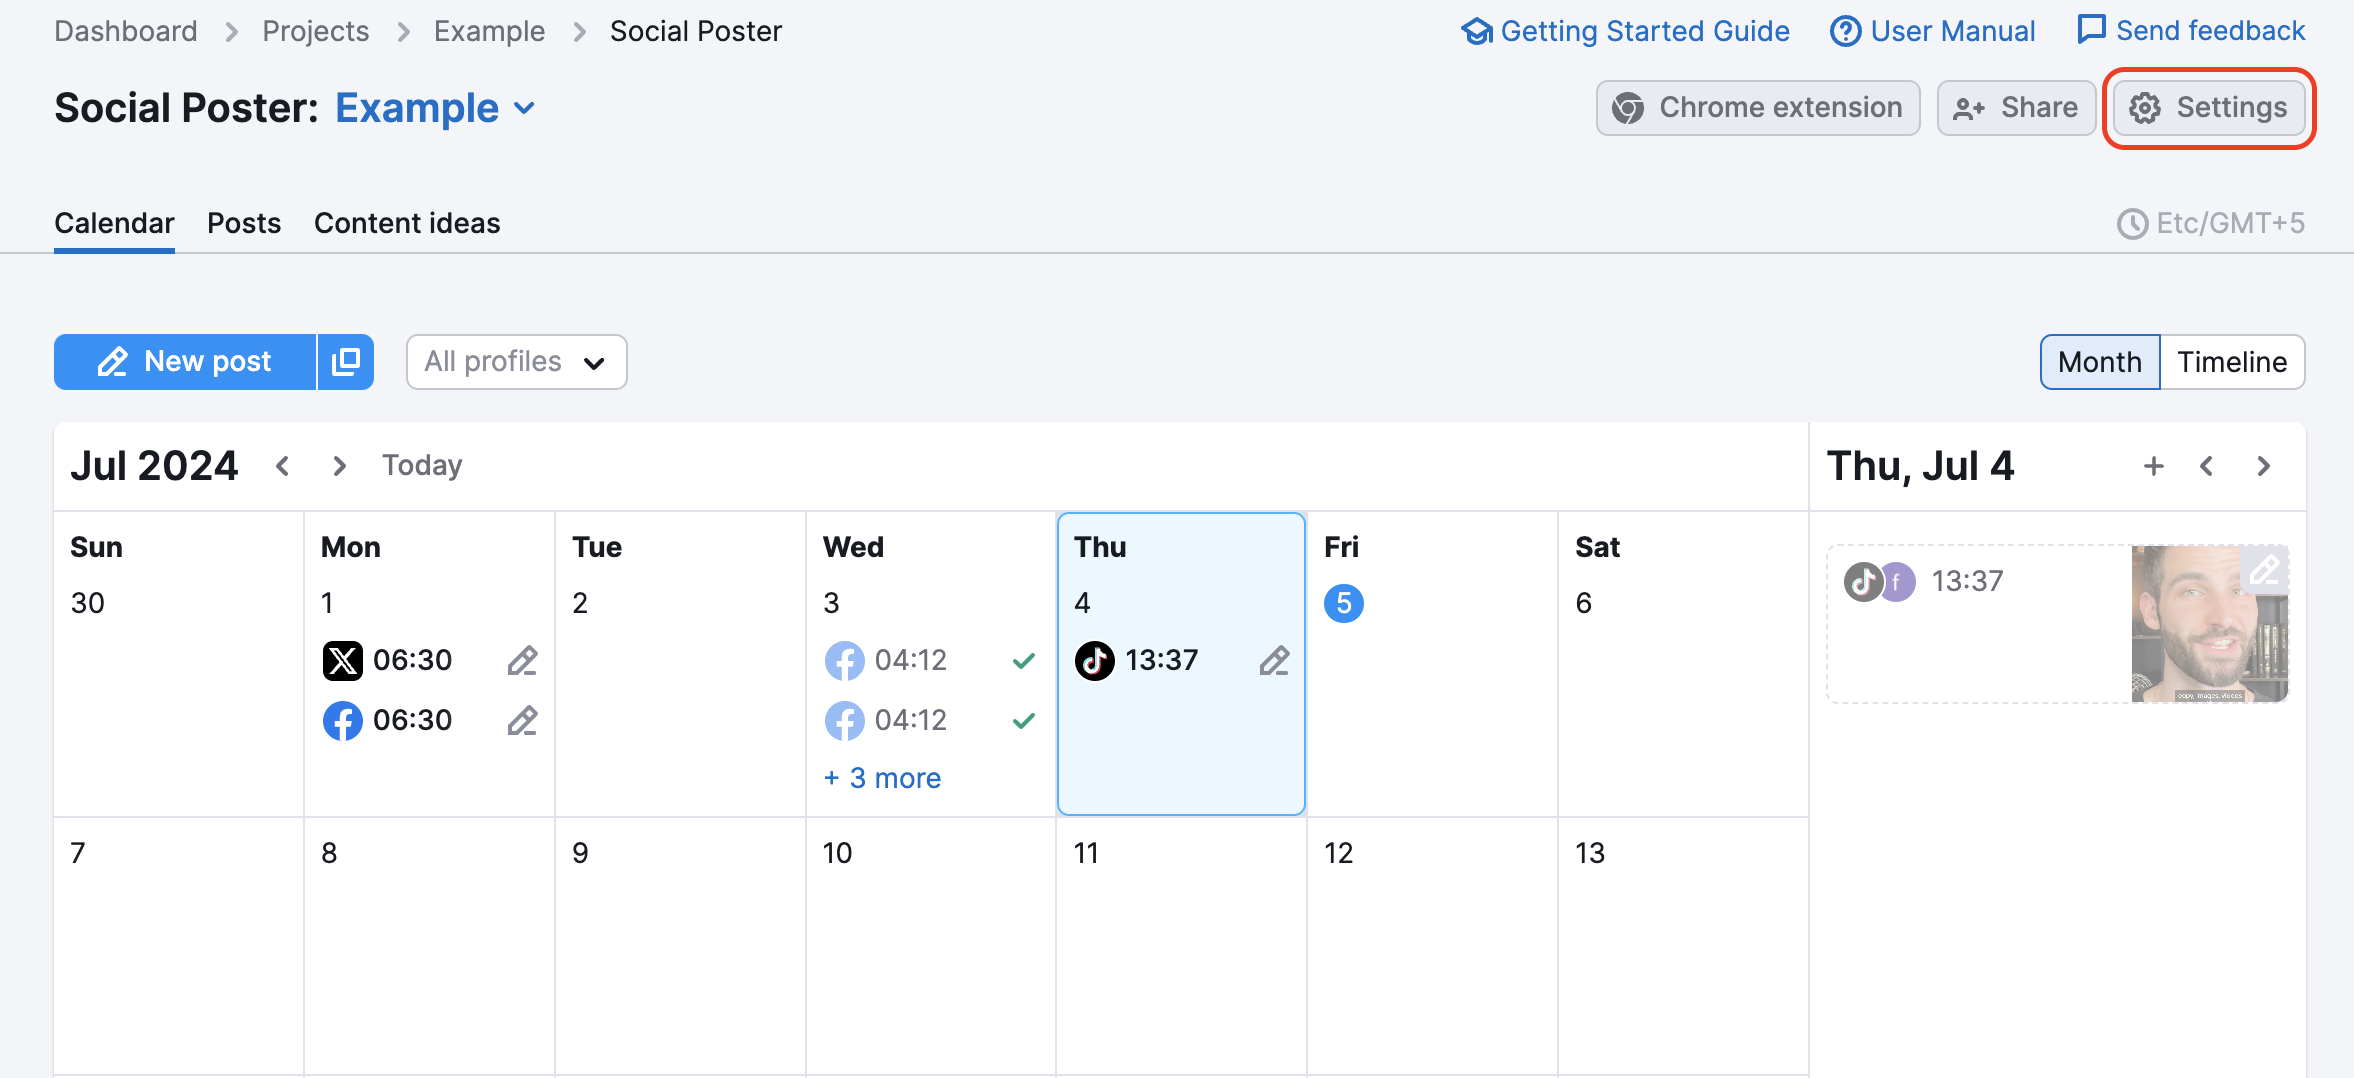
Paso 2. Ajusta tu configuración
Este paso es opcional y puedes completarlo más tarde: una vez que conectes un perfil, podrás empezar a crear posts y programarlos.
Para ajustar la configuración, ve al botón "Configuración" situado en la parte superior derecha de la interfaz de la herramienta y haz clic en una de las cuatro opciones.
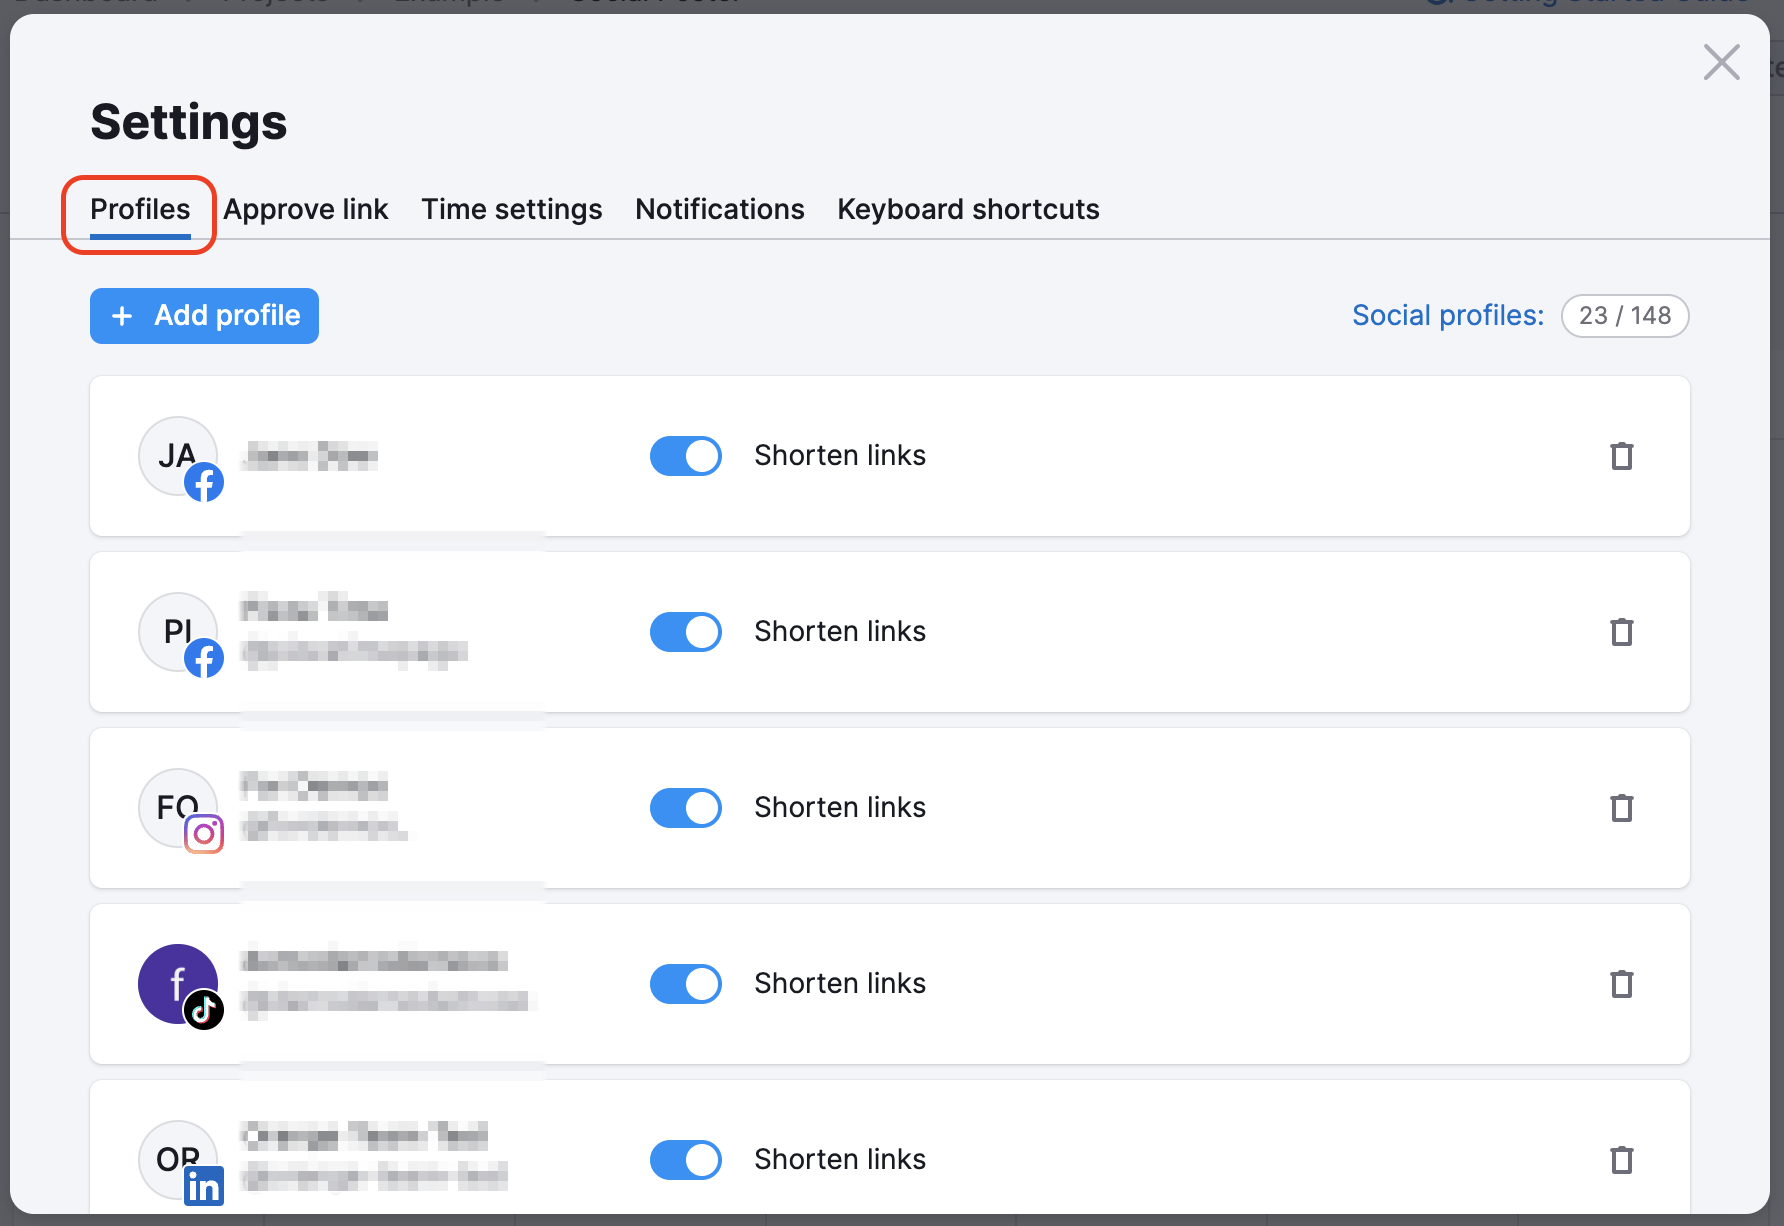
La pestaña "Perfiles" te permite:
- Desconectar tus perfiles de redes sociales; haz clic en el icono de la papelera situado junto a un perfil.
- Permitir o no permitir enlaces acortados a través de bit.ly; para ello, basta con mover el control deslizante.
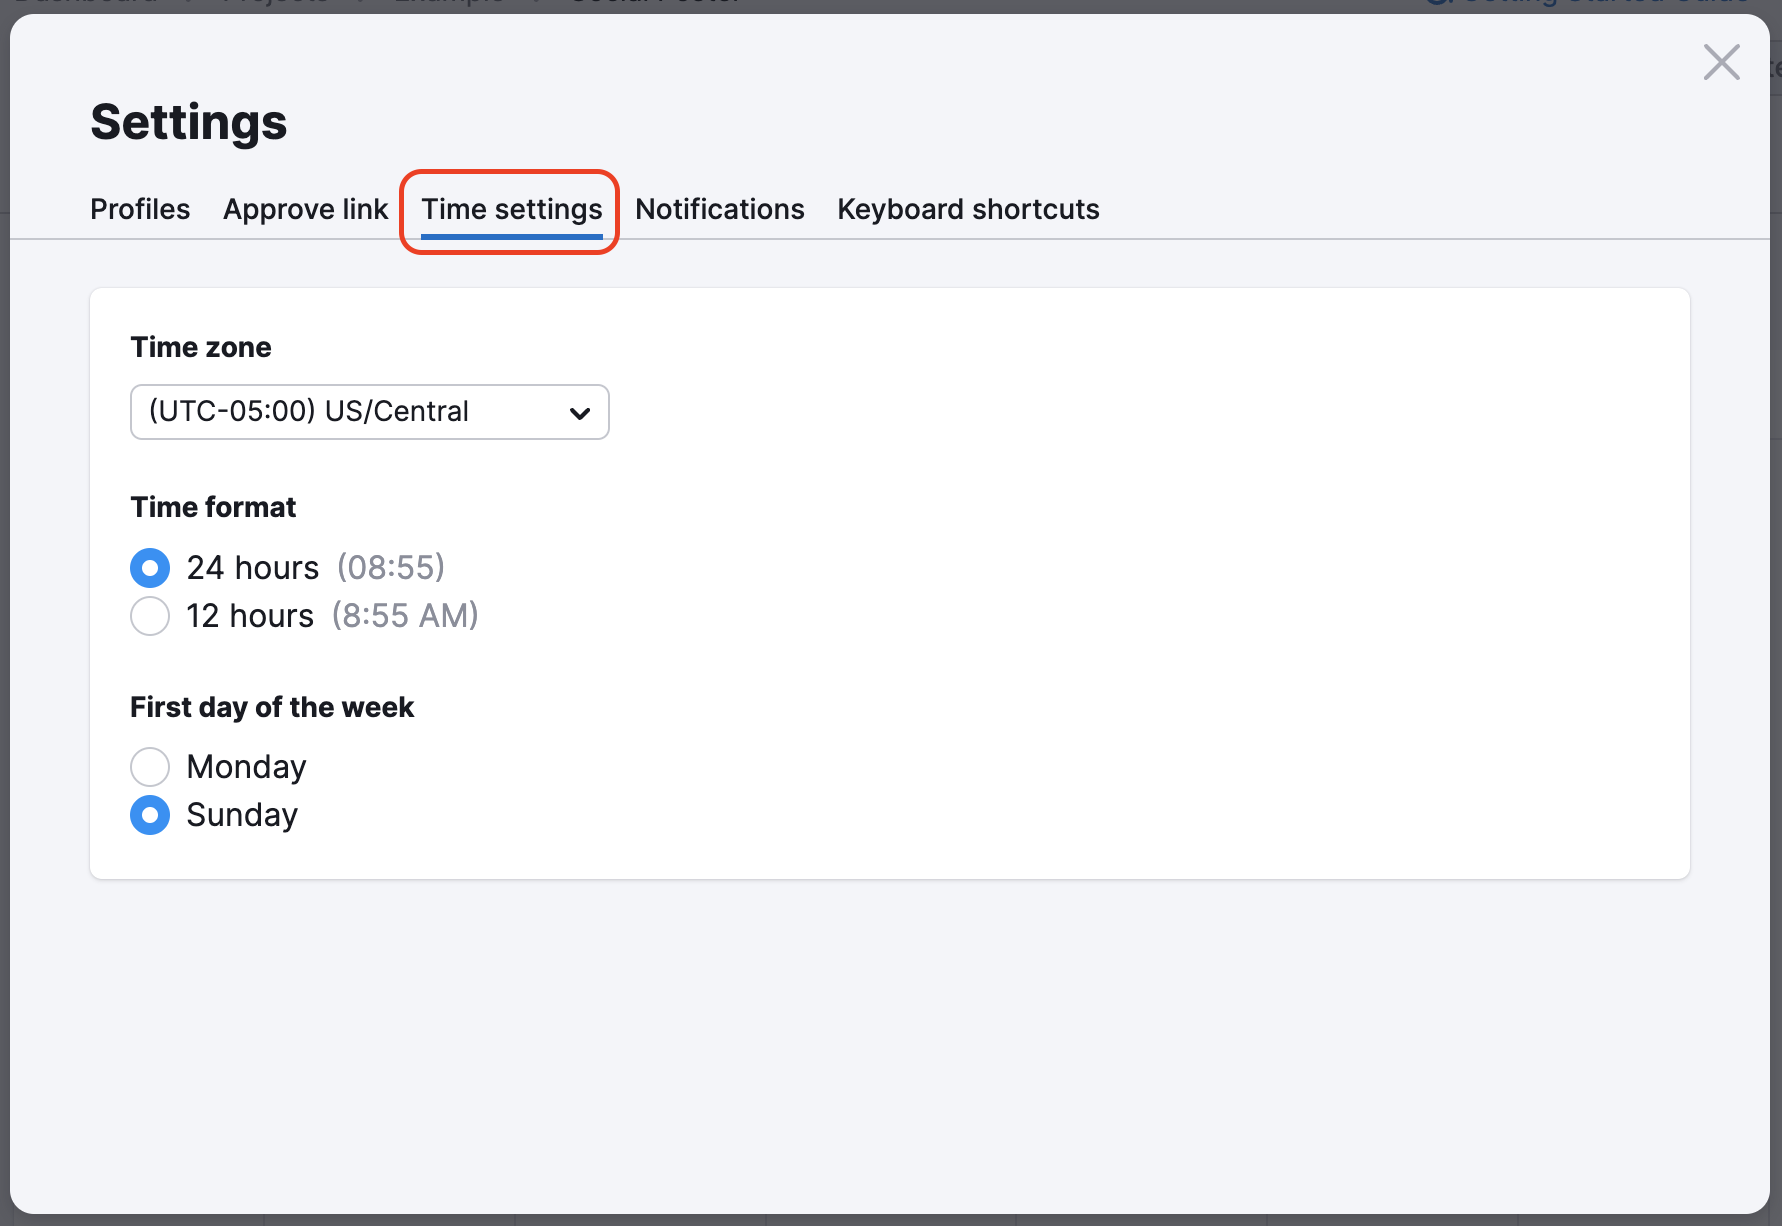
Los "Ajustes de tiempo" te permiten seleccionar:
- Zona horaria
- Formato de hora (24 h o 12 h).
- Primer día de la semana: lunes o domingo.
En "Notificaciones ", puedes configurar alertas especiales.

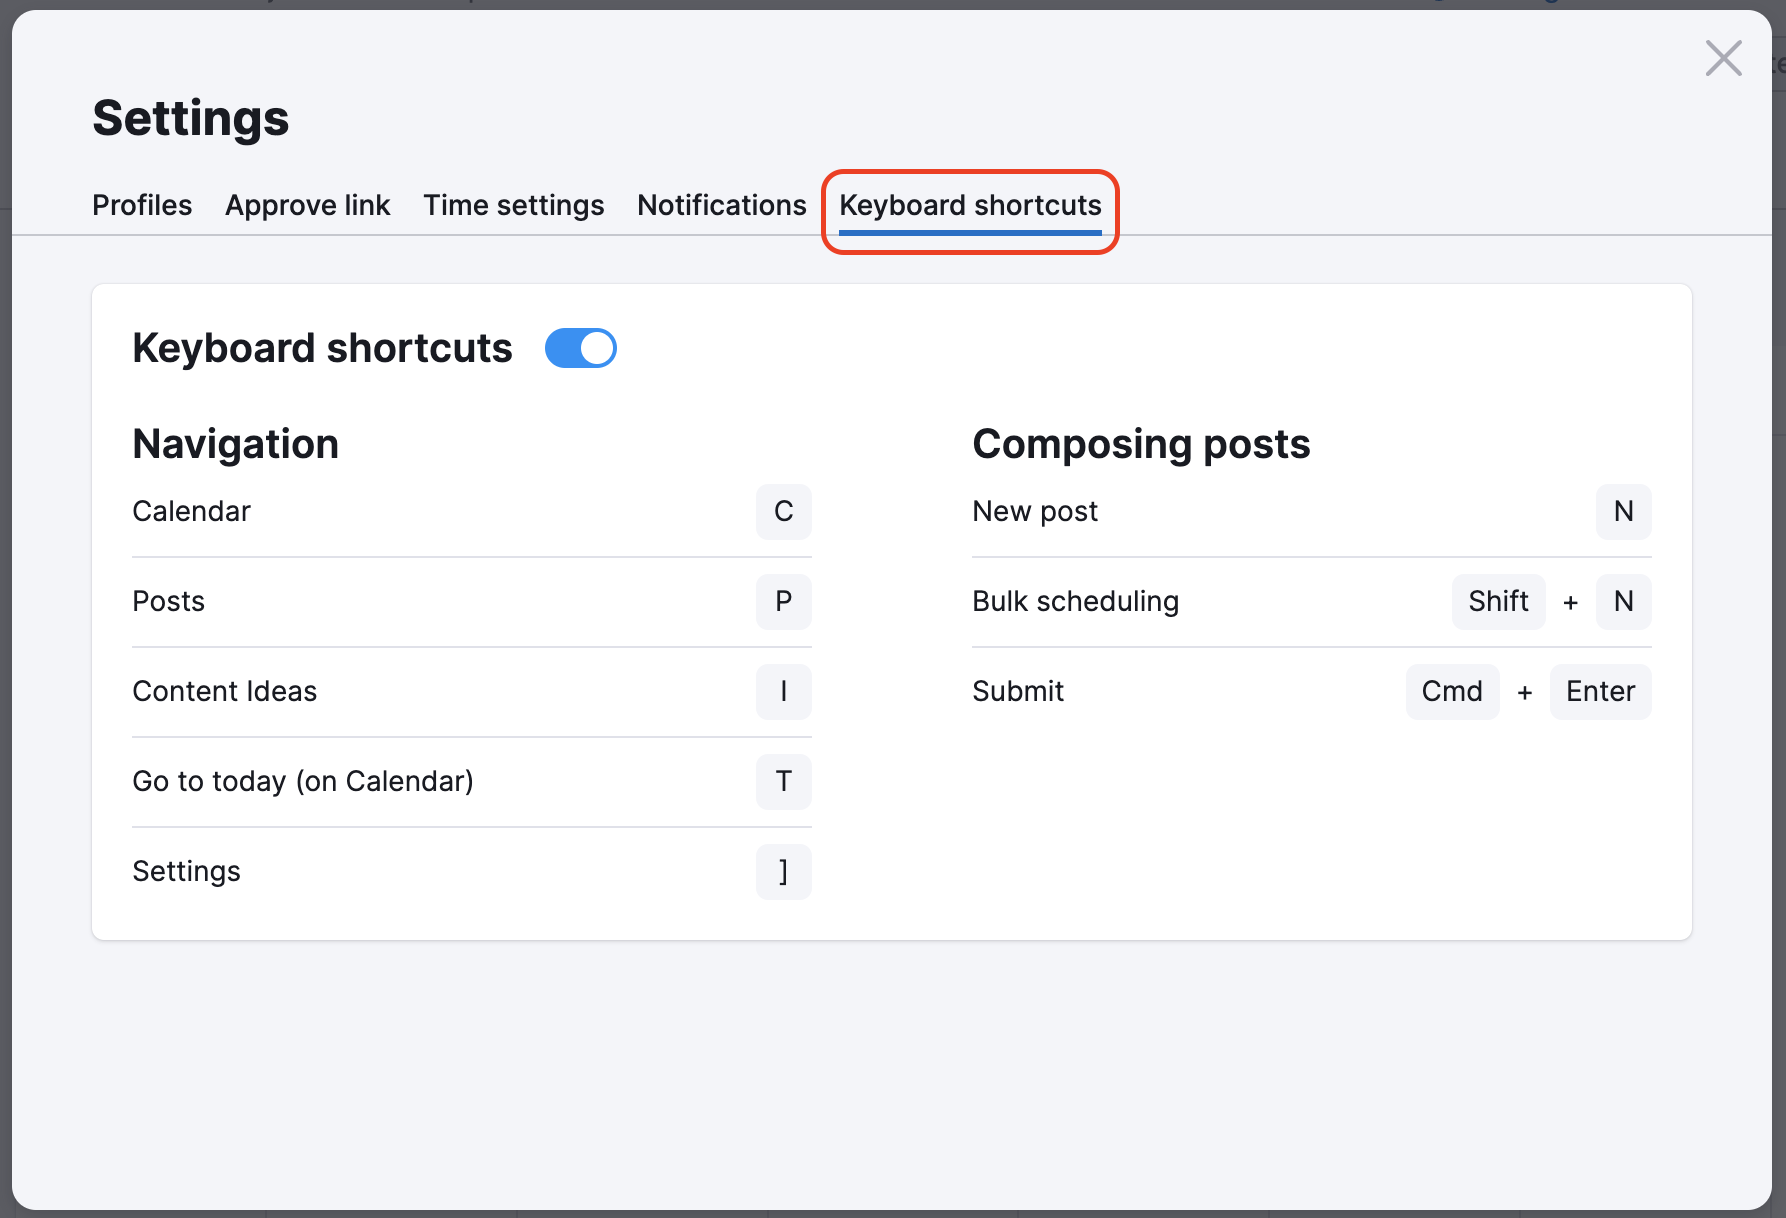
La pestaña "Atajos de teclado" te permite:
- Ver las teclas de acceso rápido que sirven para navegar más rápido por la herramienta
- Desactivar o activar los atajos de teclado moviendo el control deslizante.
Ahora que la herramienta está totalmente configurada, empieza a crear y programar tus publicaciones.
También puedes compartir tu carpeta directamente desde la herramienta Social Poster haciendo clic en el botón Compartir de la parte superior derecha, añadiendo una dirección de correo electrónico y seleccionando los permisos de visualización.
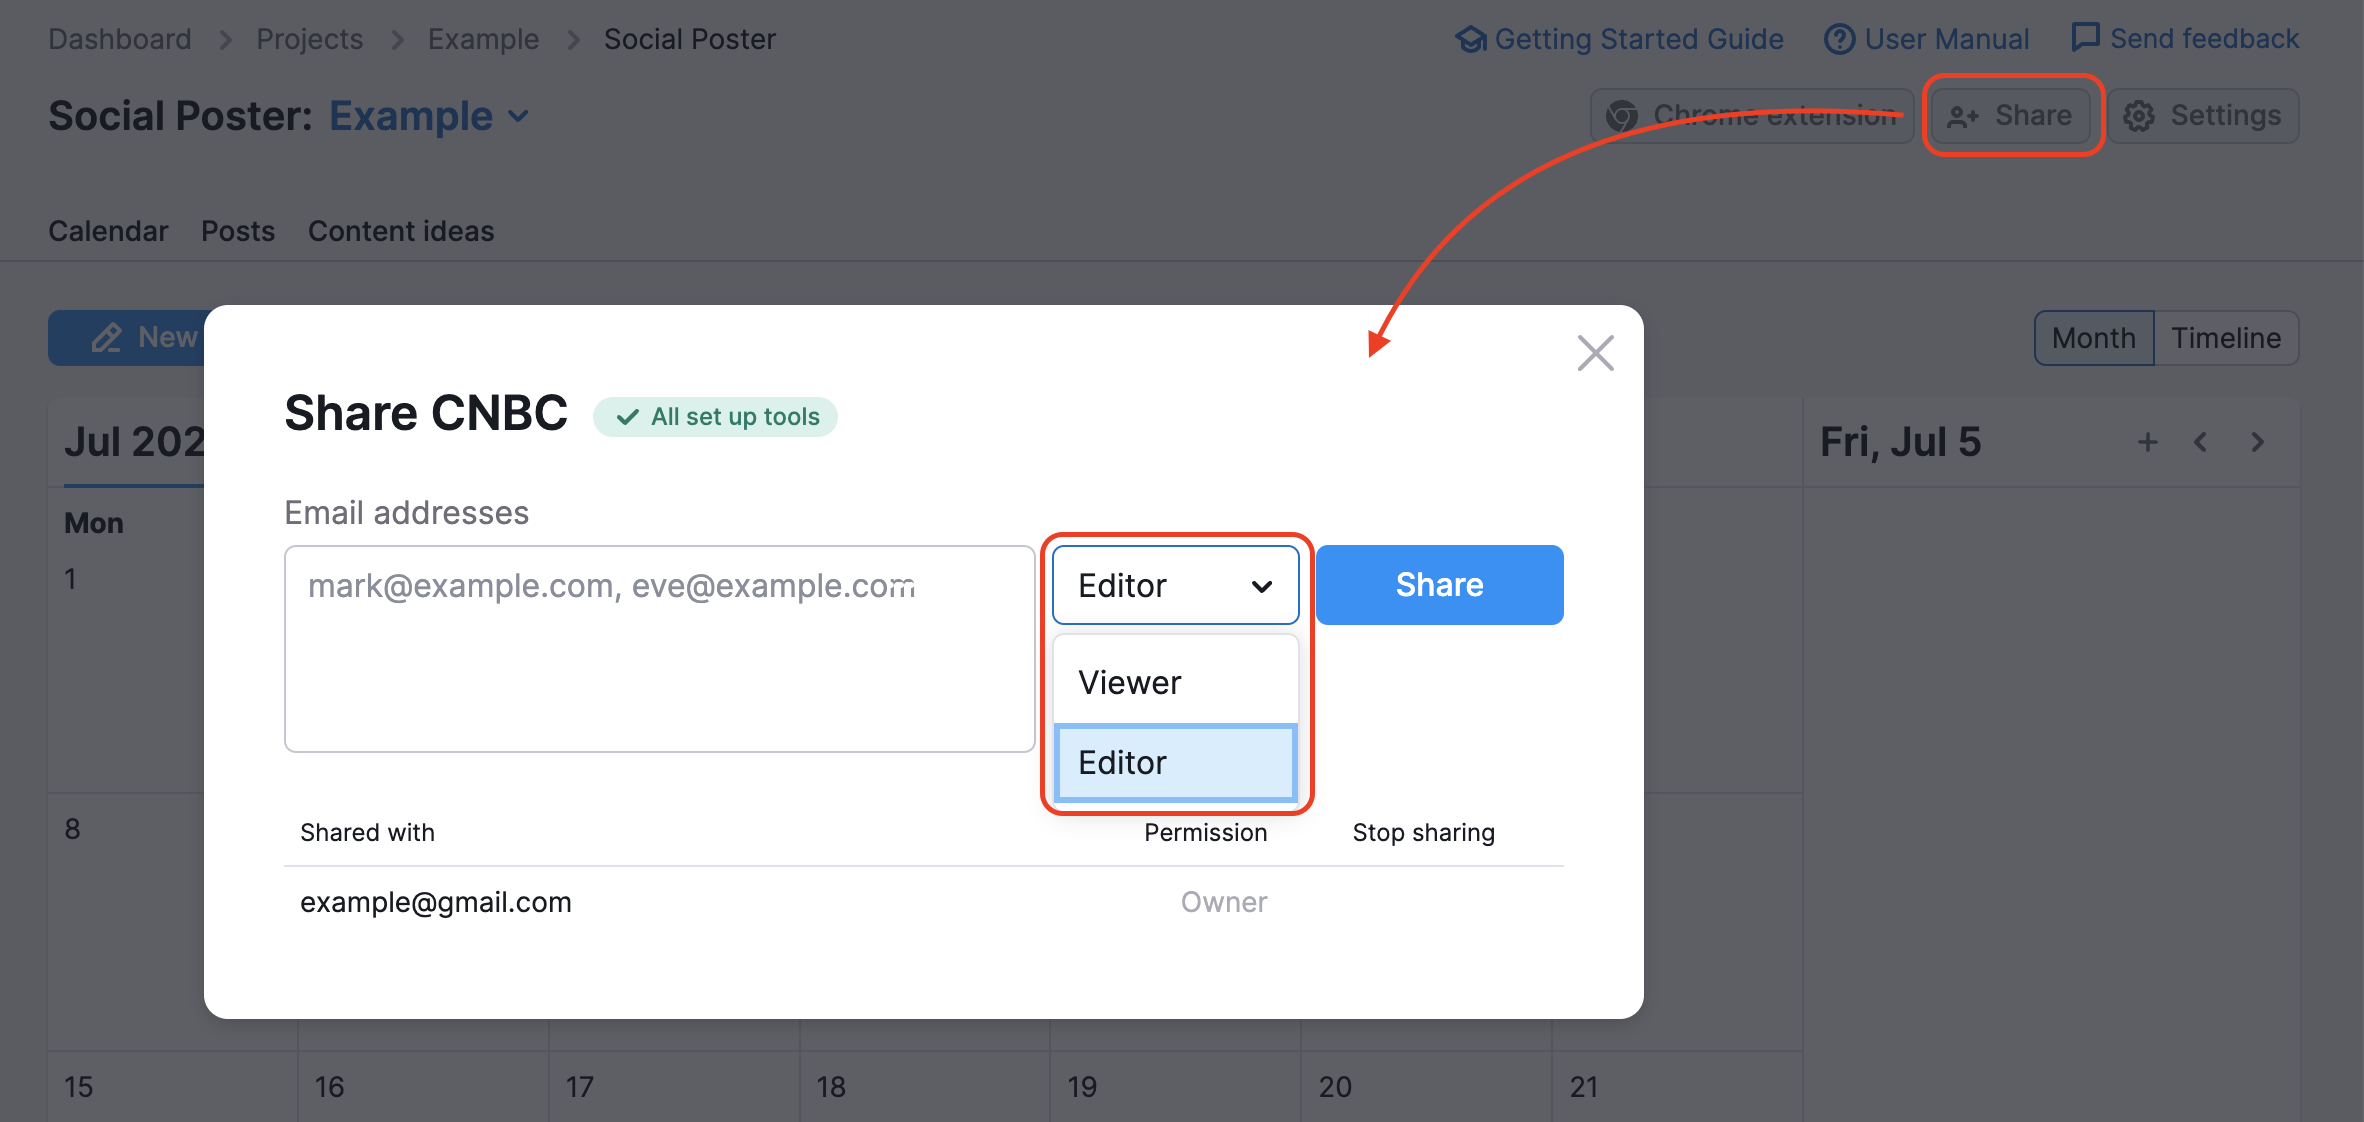
Para que alguien pueda ver tu carpeta con permiso de Editor, es necesario que haya adquirido el Kit de herramientas Social de Semrush. Si compartes una carpeta con acceso de Editor con alguien que no dispone de suscripción a Semrush Social, esa persona solo podrá ver la carpeta, no podrá editar nada.